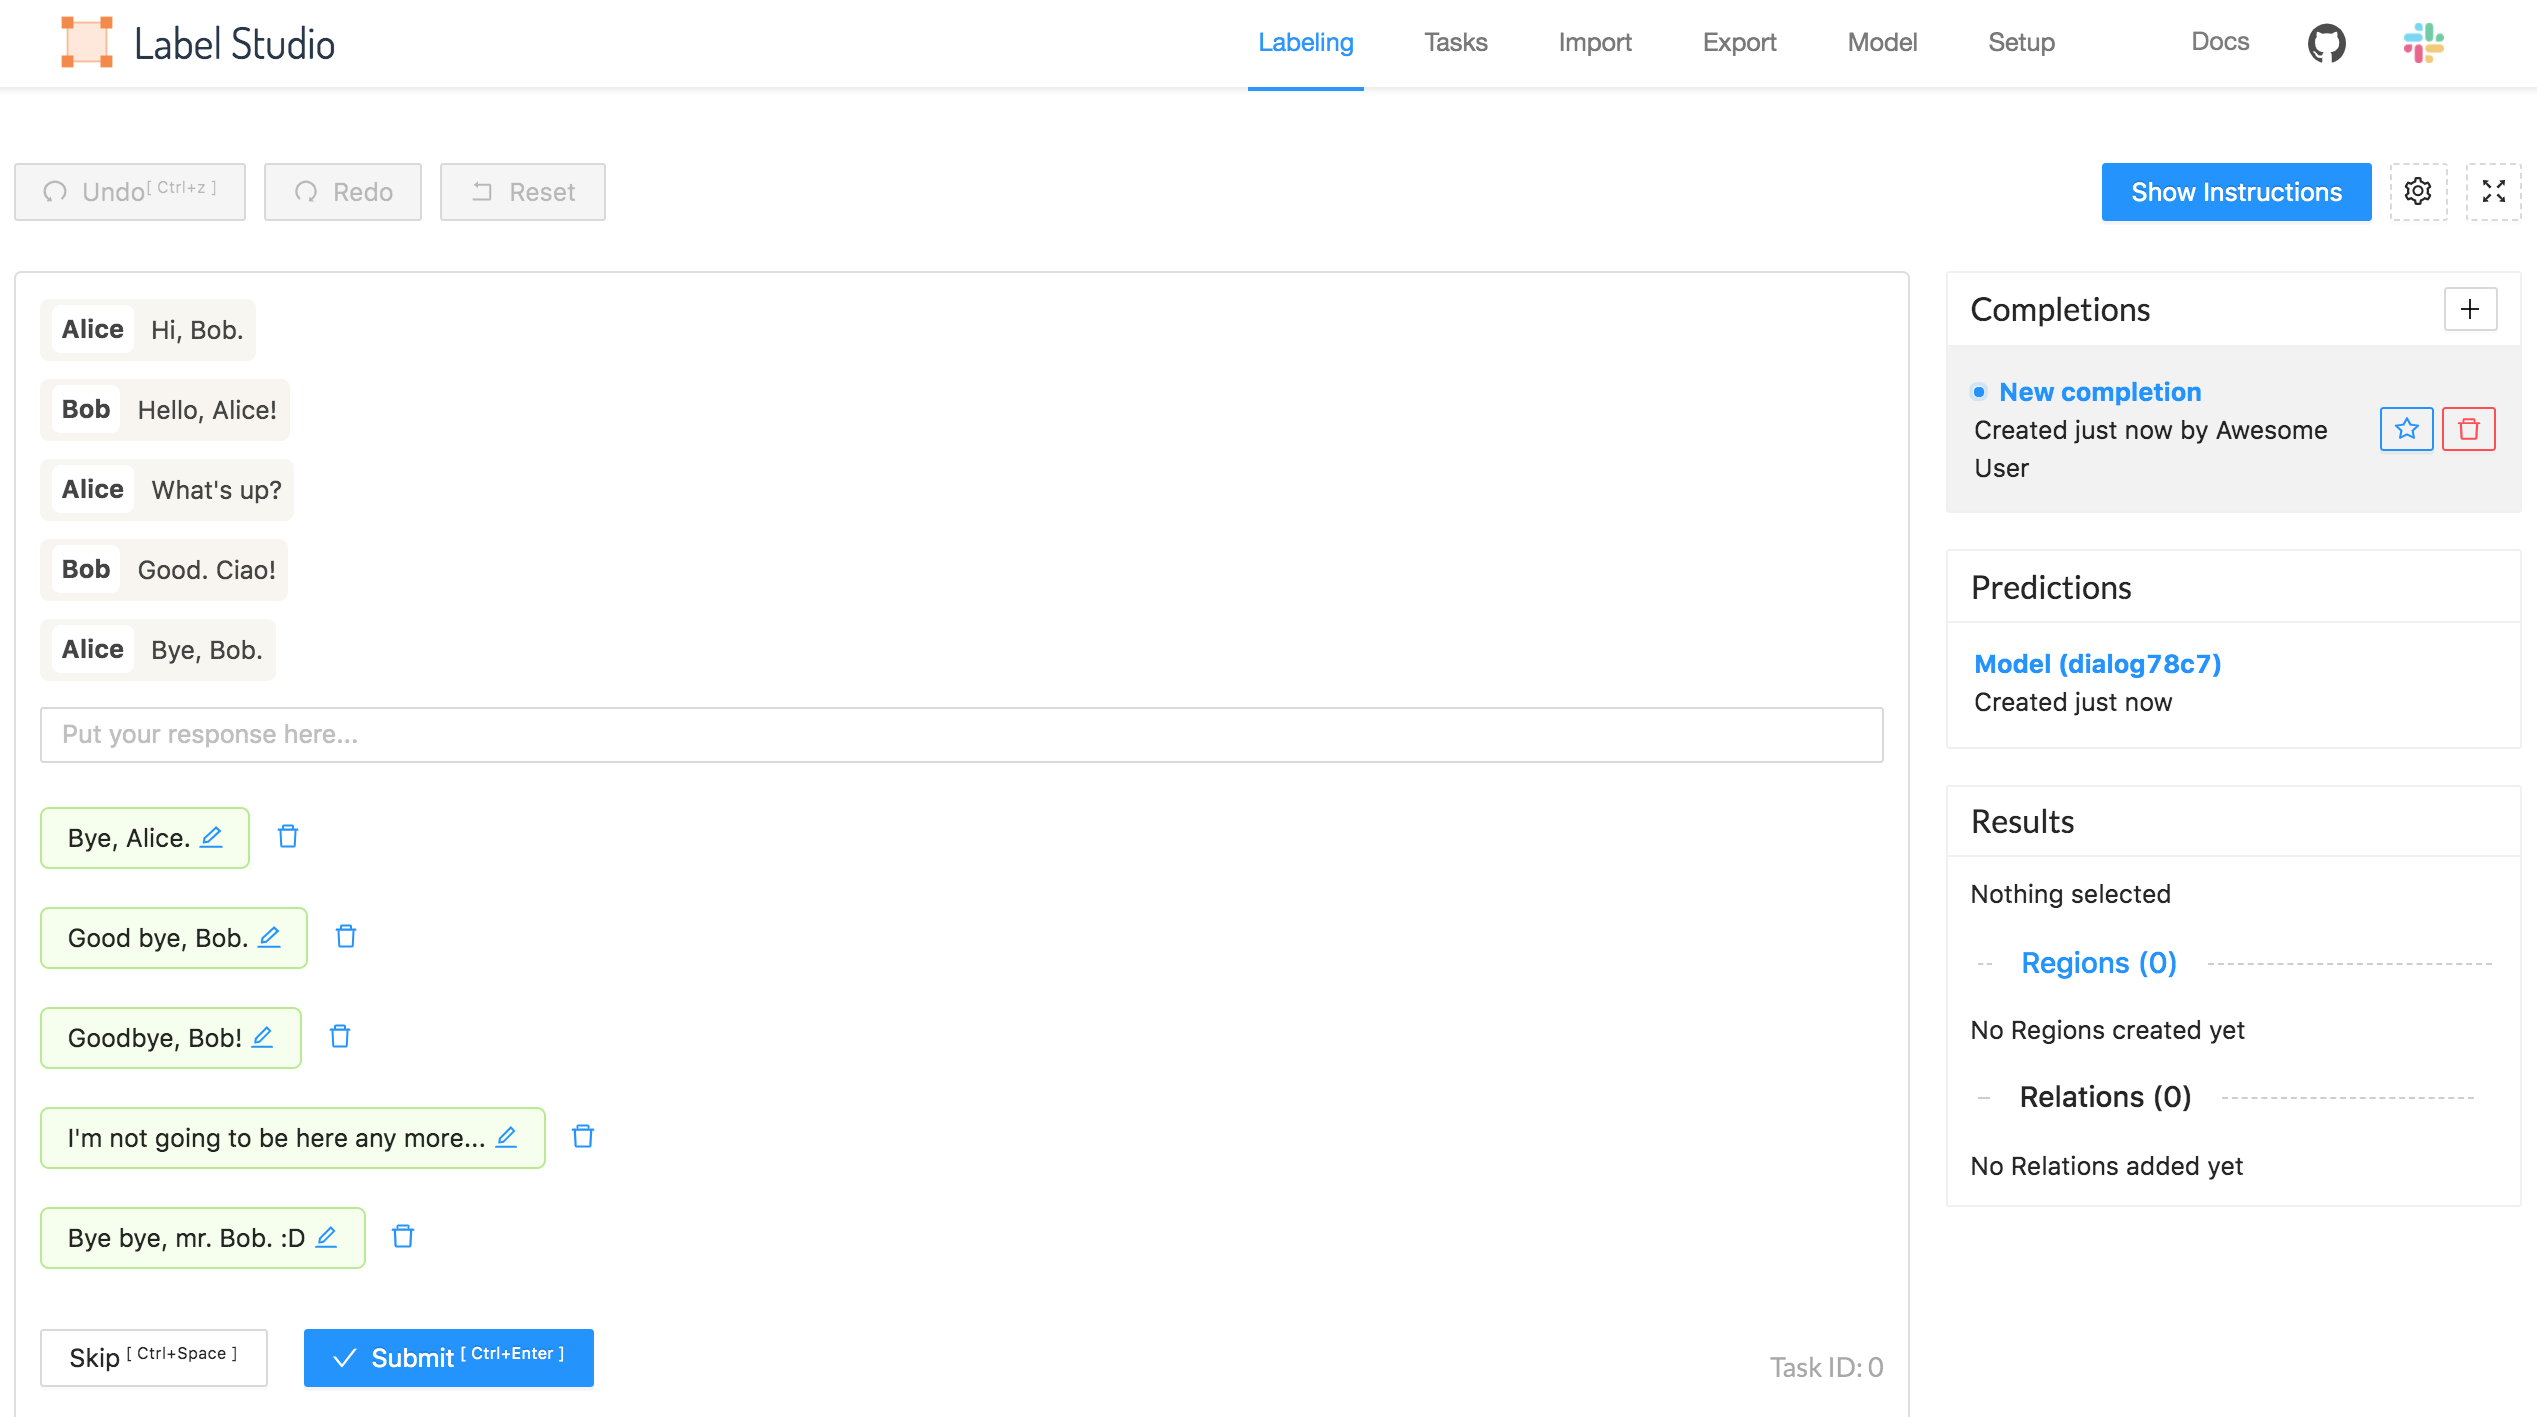
Chatbot response generation with HuggingFace's GPT2 model
If you want to build a new chatbot, or just experiment with GPT-based text generators, this Machine Learning backend example is for you! Powered by HuggingFace’s Transformers library,
it connects a GPT2-like language model to the Label Studio UI, giving you an opportunity to explore different text responses based on the chat history.
Follow this installation guide and then play around with the results. Generate your next superpowered chatbot dataset by editing, removing, or adding new phrases!

Start using it
Install ML backend:
pip install -r label_studio_ml/examples/huggingface/requirements.txt
label-studio-ml init my-ml-backend --from label_studio_ml/examples/huggingface/gpt.py
label-studio-ml start my-ml-backend
Start Label Studio and create a new project.
In the project Settings, set up the Labeling Interface.
Select Browse Templates and select the Conversational AI Response Generation template.
Open the Machine Learning settings and click Add Model.
Add the URL
http://localhost:9090and save the model as an ML backend.
You can import your chat dialogs in the input format of <Paragraphs> object tag, or use a sample task import just to give it a try.
After you import data, you’ll see text boxes with generated answers.
Tweaking parameters
You can control some model parameters when you start the ML backend:
For example, you can specify the model that you want to use, and the number of responses returned by the model:
label-studio-ml start my-ml-backend --with \
model=microsoft/DialoGPT-small \
num_responses=5
model
Model name from HuggingFace model hub
num_responses
Number of generated responses