Response Selection

If you want to refine the best response for a conversational AI use case, you can provide already-generated responses to annotators and have them choose the best one.
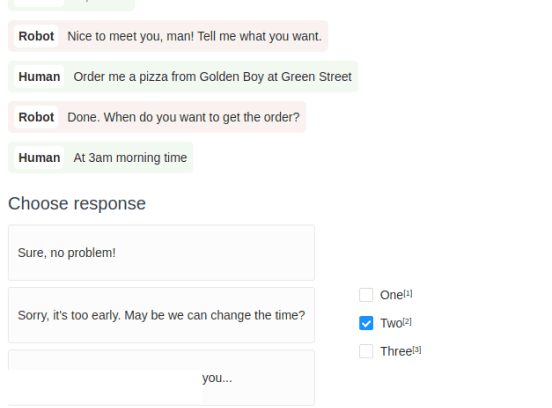
Use this template to provide a section of dialogue and three text responses to the dialogue. Annotators then select the choice that corresponds with the best-fitting text response.
Interactive Template Preview
Labeling Configuration
<View>
  <Paragraphs name="prg" value="$dialogue" layout="dialogue" />
  <Header value="Choose a response" />
  <View style="display: flex">
    <View>
    <Text name="resp1" value="$respone" />
    <Text name="resp2" value="$resptwo" />
    <Text name="resp3" value="$respthree" />
    </View>
    <View style="padding: 50px;">
    <Choices name="resp" toName="prg" required="true">
      <Choice value="One" />
      <Choice value="Two" />
      <Choice value="Three" />
    </Choices>
    </View>
  </View>
</View>
About the labeling configuration
All labeling configurations must be wrapped in View tags.
Use the Paragraphs object tag to display dialogue to annotators:
<Paragraphs name="prg" value="$dialogue" layout="dialogue" />You can add a header to provide instructions to the annotator:
<Header value="Choose a response" />Use a new View tag to control the dsiplay of text and choices on the labeling interface:
<View style="display: flex">Use the Text object tag to display 3 different text samples, specified with variables in the value parameter:
<View>
    <Text name="resp1" value="$respone" />
    <Text name="resp2" value="$resptwo" />
    <Text name="resp3" value="$respthree" />
</View>
Style the View tag that wraps the choices to make sure there is space between the text samples and the corresponding choices:
<View style="padding: 50px;">
<Choices name="resp" toName="prg" required="true">
  <Choice value="One" />
  <Choice value="Two" />
 <Choice value="Three" />
</Choices>
</View>
Use the Choices control tag to allow annotators to choose which text sample is the best response to the dialogue.