guide
- Get started
- Label Studio features
- Billing & Usage
- Release notes
Security and Privacy
- Secure Label Studio
Install and Upgrade
- Install and upgrade Label Studio
- Database setup
- Start Label Studio
- Troubleshooting
Deploy and Install Enterprise
- Install Label Studio Enterprise
- Set up persistent storage
- Set up an ingress controller
- Install with Docker
- Deploy on Kubernetes
- Install on airgapped server
- Install on Amazon EKS
- Available Helm values
Manage Users
- Set up user accounts
- Manage access
- Set up authentication
- Set up SCIM2
Import Data
- Import data
- Import pre-annotations
- Cloud storage setup
Labeling and Projects
- Project setup
- Manage data
- Set up your labeling interface
- Label and annotate data
- Comments and notifications
Manage Annotations
- Review annotations
- Annotation statistics
- Custom agreement metric
- Export annotations
Machine Learning Setup
- Machine learning integration
- Write your own ML backend
- ML Examples and Tutorials
- Active learning loop
- Troubleshoot machine learning
Integrations
- Webhook Setup
- Webhooks Event Reference
- Custom Webhooks
- Python SDK Tutorial
- Backend API
Advanced Development
- Frontend library
- Frontend reference
- Update scripts and API calls

Manage access to Label Studio
Manage access to projects, organizations, and workspaces in Label Studio to restrict who can view data, annotations, and predictions in your data labeling projects.
Role-based access control, organizations, and workspaces are available only in Label Studio Enterprise Edition. For information about users in the open source Label Studio Community Edition, see Set up user accounts for Label Studio.
Roles in Label Studio Enterprise
There are five roles available in Label Studio Enterprise Edition. Organization members have different levels of access to projects and workspaces. Every member can label tasks.
Table 1: Roles in Label Studio Enterprise
| Role | Description |
|---|---|
| Owner | Not an assignable role. Manages Label Studio. Can create and modify workspaces, create and modify projects, and view activity log. |
| Administrator | Has full access to all workspaces and projects. Can modify workspaces, view activity logs, and approve invitations. Can’t see the workspace owner’s account page. |
| Manager | After being assigned to a workspace by an Owner or Administrator, has full administrative access in the assigned workspaces. Can view any project and has full access to their own projects. |
| Reviewer | Reviews annotated tasks. Can view projects with tasks assigned to them. Can review and update task annotations. |
| Annotator | Labels tasks. Can view projects with tasks assigned to them and label tasks in those projects. |
Roles in Label Studio Teams
There are two roles available in Label Studio Teams Edition. Organization members have different levels of access to projects and workspaces. Every member can label tasks.
Table 2: Roles in Label Studio Teams
| Role | Description |
|---|---|
| Owner | Not an assignable role. Manages Label Studio. Can create and modify workspaces, create and modify projects, and view activity log. |
| Manager | After being assigned to a workspace by an Owner, has full administrative access in the assigned workspaces. Can view any project and has full access to their own projects. |
Roles and workspaces
Use a combination of roles, to control what actions users can take, and project workspaces, to control what data and projects users have access to.
For example, a project annotator using Label Studio sees only the projects they have access to: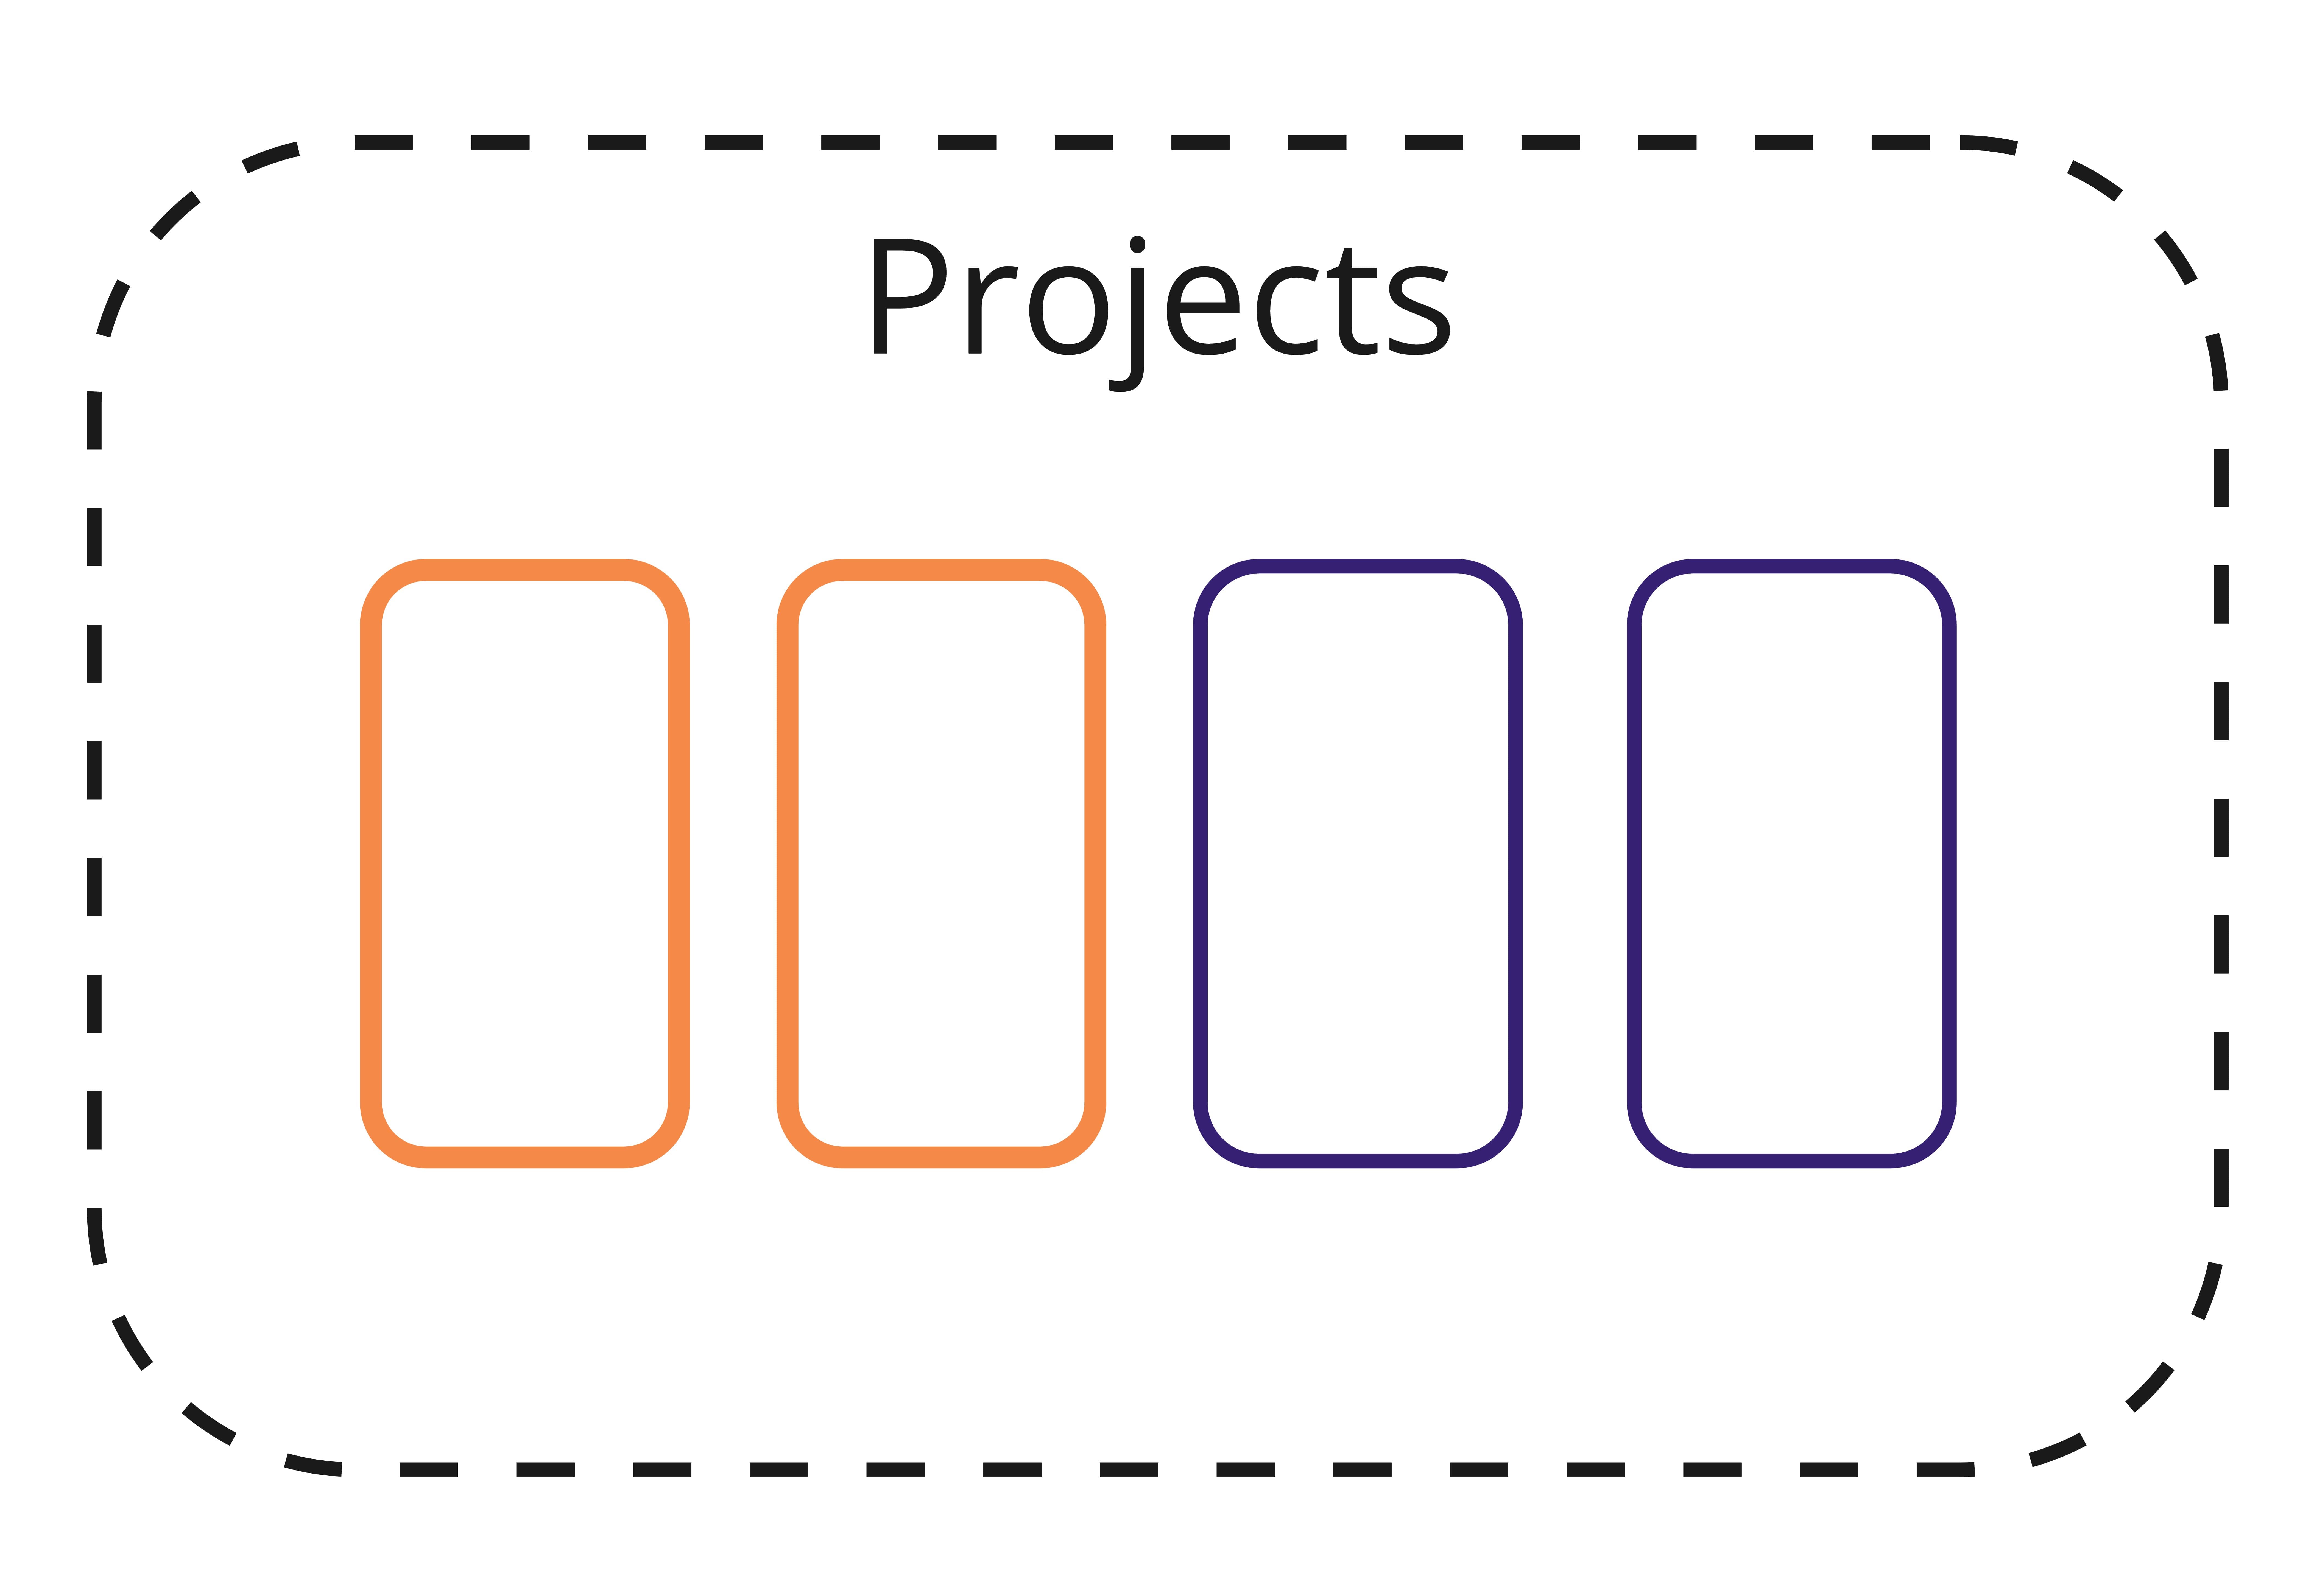
Figure 1: Only Label Studio projects are added and visible to an annotator.
A Label Studio administrator sees all projects and workspaces that exist in the Label Studio instance: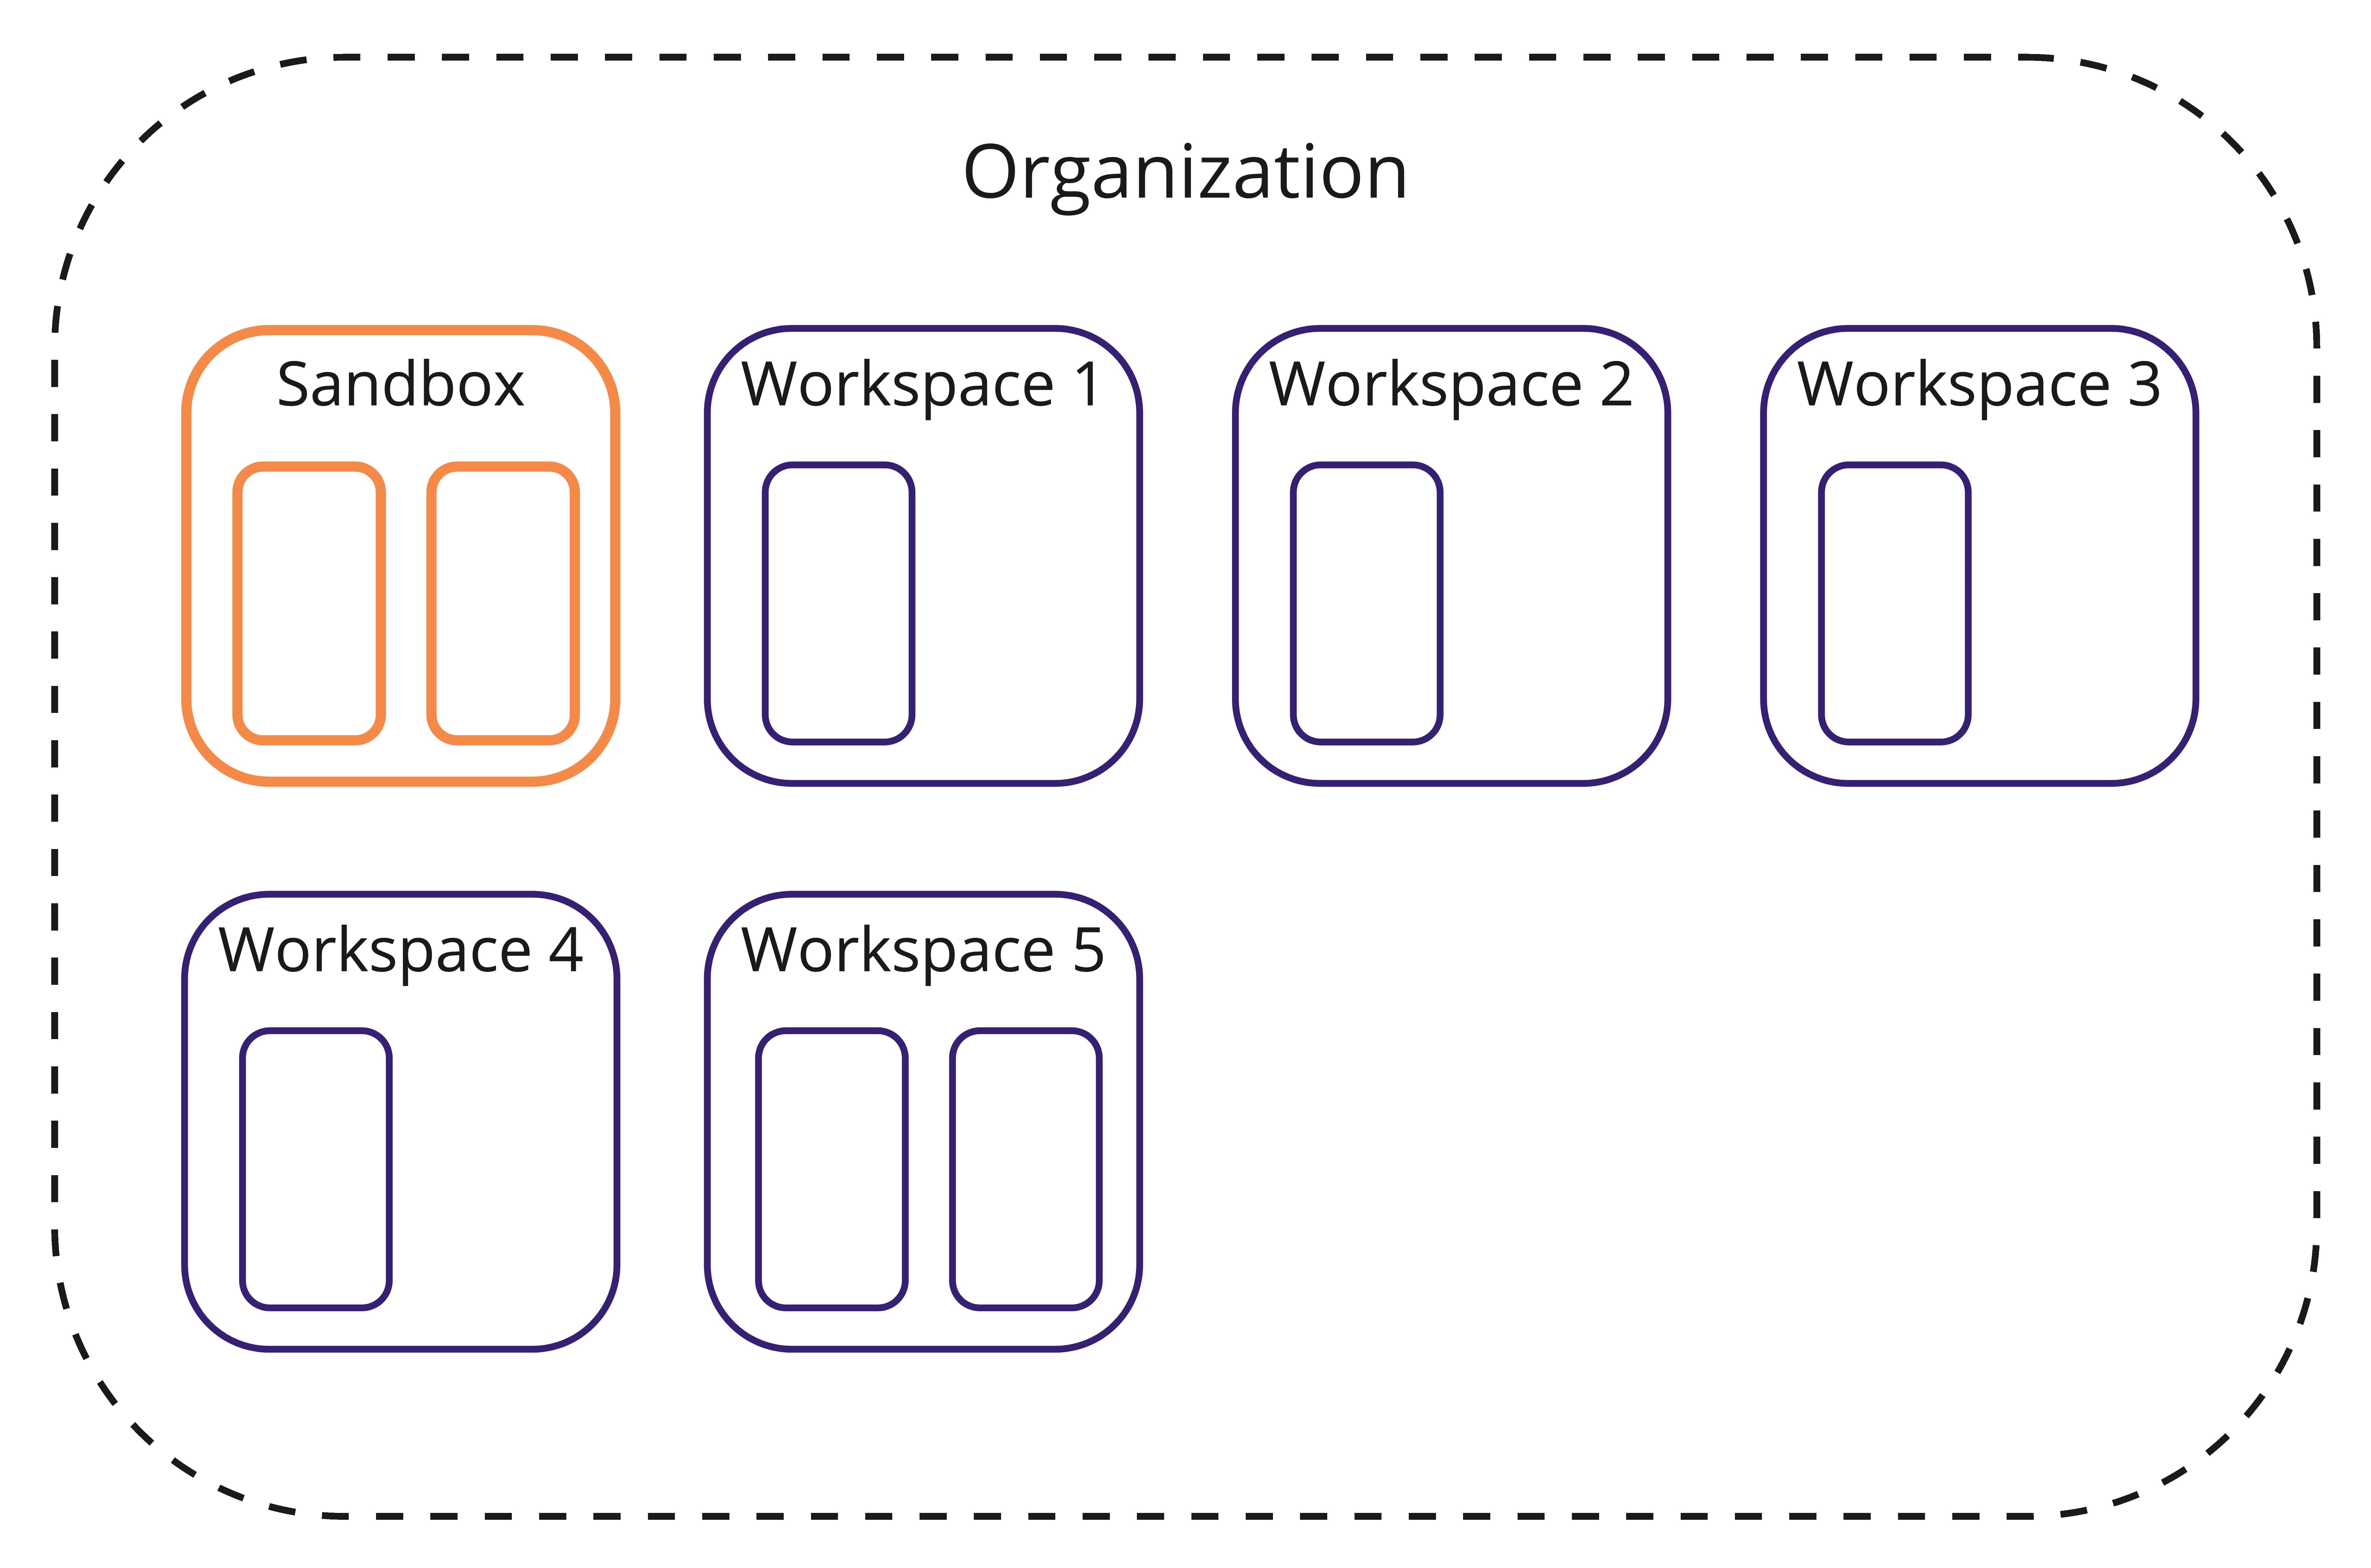
Figure 2: An administrator can view all projects and workspaces in a Label Studio instance.
Permissions in Label Studio Enterprise
Table 3: Permissions in Label Studio Enterprise
| Action | Annotator | Reviewer | Manager | Administrator | Owner |
|---|---|---|---|---|---|
| User Management | |||||
| Change user roles | ✔️ | ✔️ | |||
| View People page | ✔️ | ✔️ | ✔️ | ||
| Invite people to organization | ✔️ | ✔️ | |||
| Workspace access | R | R | CRUD | CRUD | CRUD |
| Project Management | |||||
| Project access | R | R | CRUD | CRUD | CRUD |
| Save custom project templates | ✔️ | ✔️ | ✔️ | ||
| Data Access | |||||
| View project data | If permitted in project settings, can view own. | ✔️ | ✔️ | ✔️ | ✔️ |
| Import data | ✔️ | ✔️ | ✔️ | ||
| Export data | ✔️ | ✔️ | ✔️ | ||
| Data Labeling Workflows | |||||
| Assign annotators to tasks | ✔️ | ✔️ | ✔️ | ✔️ | |
| Access labeling workflow | ✔️ | ✔️ | ✔️ | ✔️ | ✔️ |
| Access review workflow | ✔️ | ✔️ | ✔️ | ✔️ | |
| Monitor annotator agreement | ✔️ | ✔️ | ✔️ | ✔️ | |
| Review annotator performance | Own | ✔️ | ✔️ | ✔️ | ✔️ |
| Verify annotation results | ✔️ | ✔️ | ✔️ | ✔️ | |
| Assign reviewers to tasks | ✔️ | ✔️ | ✔️ | ||
| Advanced | |||||
| API access to equivalent Label Studio functionality | ✔️ for own or workspace projects | ✔️ | ✔️ | ||
| Analytics | |||||
| Track what happens and when on annotation dashboards | Own | Project | Workspace and invited projects | Organization️ | Organization️ |
| View annotator dashboard | ✔️ | ||||
| View system-wide activity log | ✔️ | ✔️ | |||
Set up role-based access control (RBAC) with Label Studio
Set up role-based access control in Label Studio by using organizations and workspaces to organize projects and assigning roles to organization members. Use roles to control what actions organization members can perform in Label Studio, and manage organization and workspace membership to manage what data and projects those people can access.
Only people with the Administrator and Owner roles can invite people to Label Studio and manage their role membership.
Invite users to Label Studio Enterprise
Invite users to your organization by doing the following:
- In the Label Studio UI, click the hamburger icon to expand the left-hand menu and click Organization.
- On the Organization page, click + Add People.
- In the dialog box that appears, click Copy Link and share the invitation link to your Label Studio instance with the people that you want to join your organization.
Assign roles to invited users
After a user that you invite clicks the link and signs up for an account, their account exists but must be activated by an organization owner or administrator. When you activate someone’s account, you also assign them a role in Label Studio.
To activate a user account and assign a role, do the following:
- In the Label Studio UI, click the hamburger icon to expand the left-hand menu and click Organization.
- Locate the user with a status of Not Activated.
- Select the drop-down under Role and select the relevant role for the user.
Your changes save automatically. Repeat these steps for any additional users.
Status of user account
!!! note
NOT_ACTIVATED status is equal to Pending status.
If a user is in Pending status then it means he was invited and signed up for the account, but his role is not defined by administrator.
If you assign Deactivate to a role then it means you free one seat in license and a user with deactivated doesn’t have access to your organization.
Programmatically assign roles
To programmatically activate and assign roles to users, you can use the following API endpoints.
Assign a role to a user
For a given user ID and a given organization ID, you can programmatically assign a role to a user by sending a POST request to the /api/organizations/{id}/memberships endpoint. See the Organizations API documentation inside Label Studio Enterprise.
Determine the organization ID or user ID
If you’re not sure what the organization ID is, you can do the following:
- If you only have one organization in your Label Studio instance, use
0. - If you have multiple organizations, make a GET request to the
/api/organizations/endpoint.
To retrieve user IDs for the members of an organization, make a GET request to /api/organizations/{id}/memberships.
Manage data and projects
You can manage data and projects in the Label Studio UI using the following:
Use the organization page
To manage organization membership, use the Organization page in the Label Studio UI. When you sign up for Label Studio Enterprise for the first time, an organization associated with your account is automatically created. You become the owner of that organization. People who join Label Studio Enterprise from an invitation link or with an LDAP or SSO role join an existing organization.
If permitted by your Label Studio Enterprise plan, you can create organizations in Label Studio to further separate access to data and projects. For example, you could create separate organizations to separate work and access between completely unrelated departments. If some departments might collaborate with each other on a project, you can use one organization for both and instead use workspaces to organize the projects that they might or might not be collaborating on.
For example, you might set up one of the following possible configurations:
One organization for your company, with one workspace for the support department and another for the development team, with specific projects in each workspace for different types of customer requests.
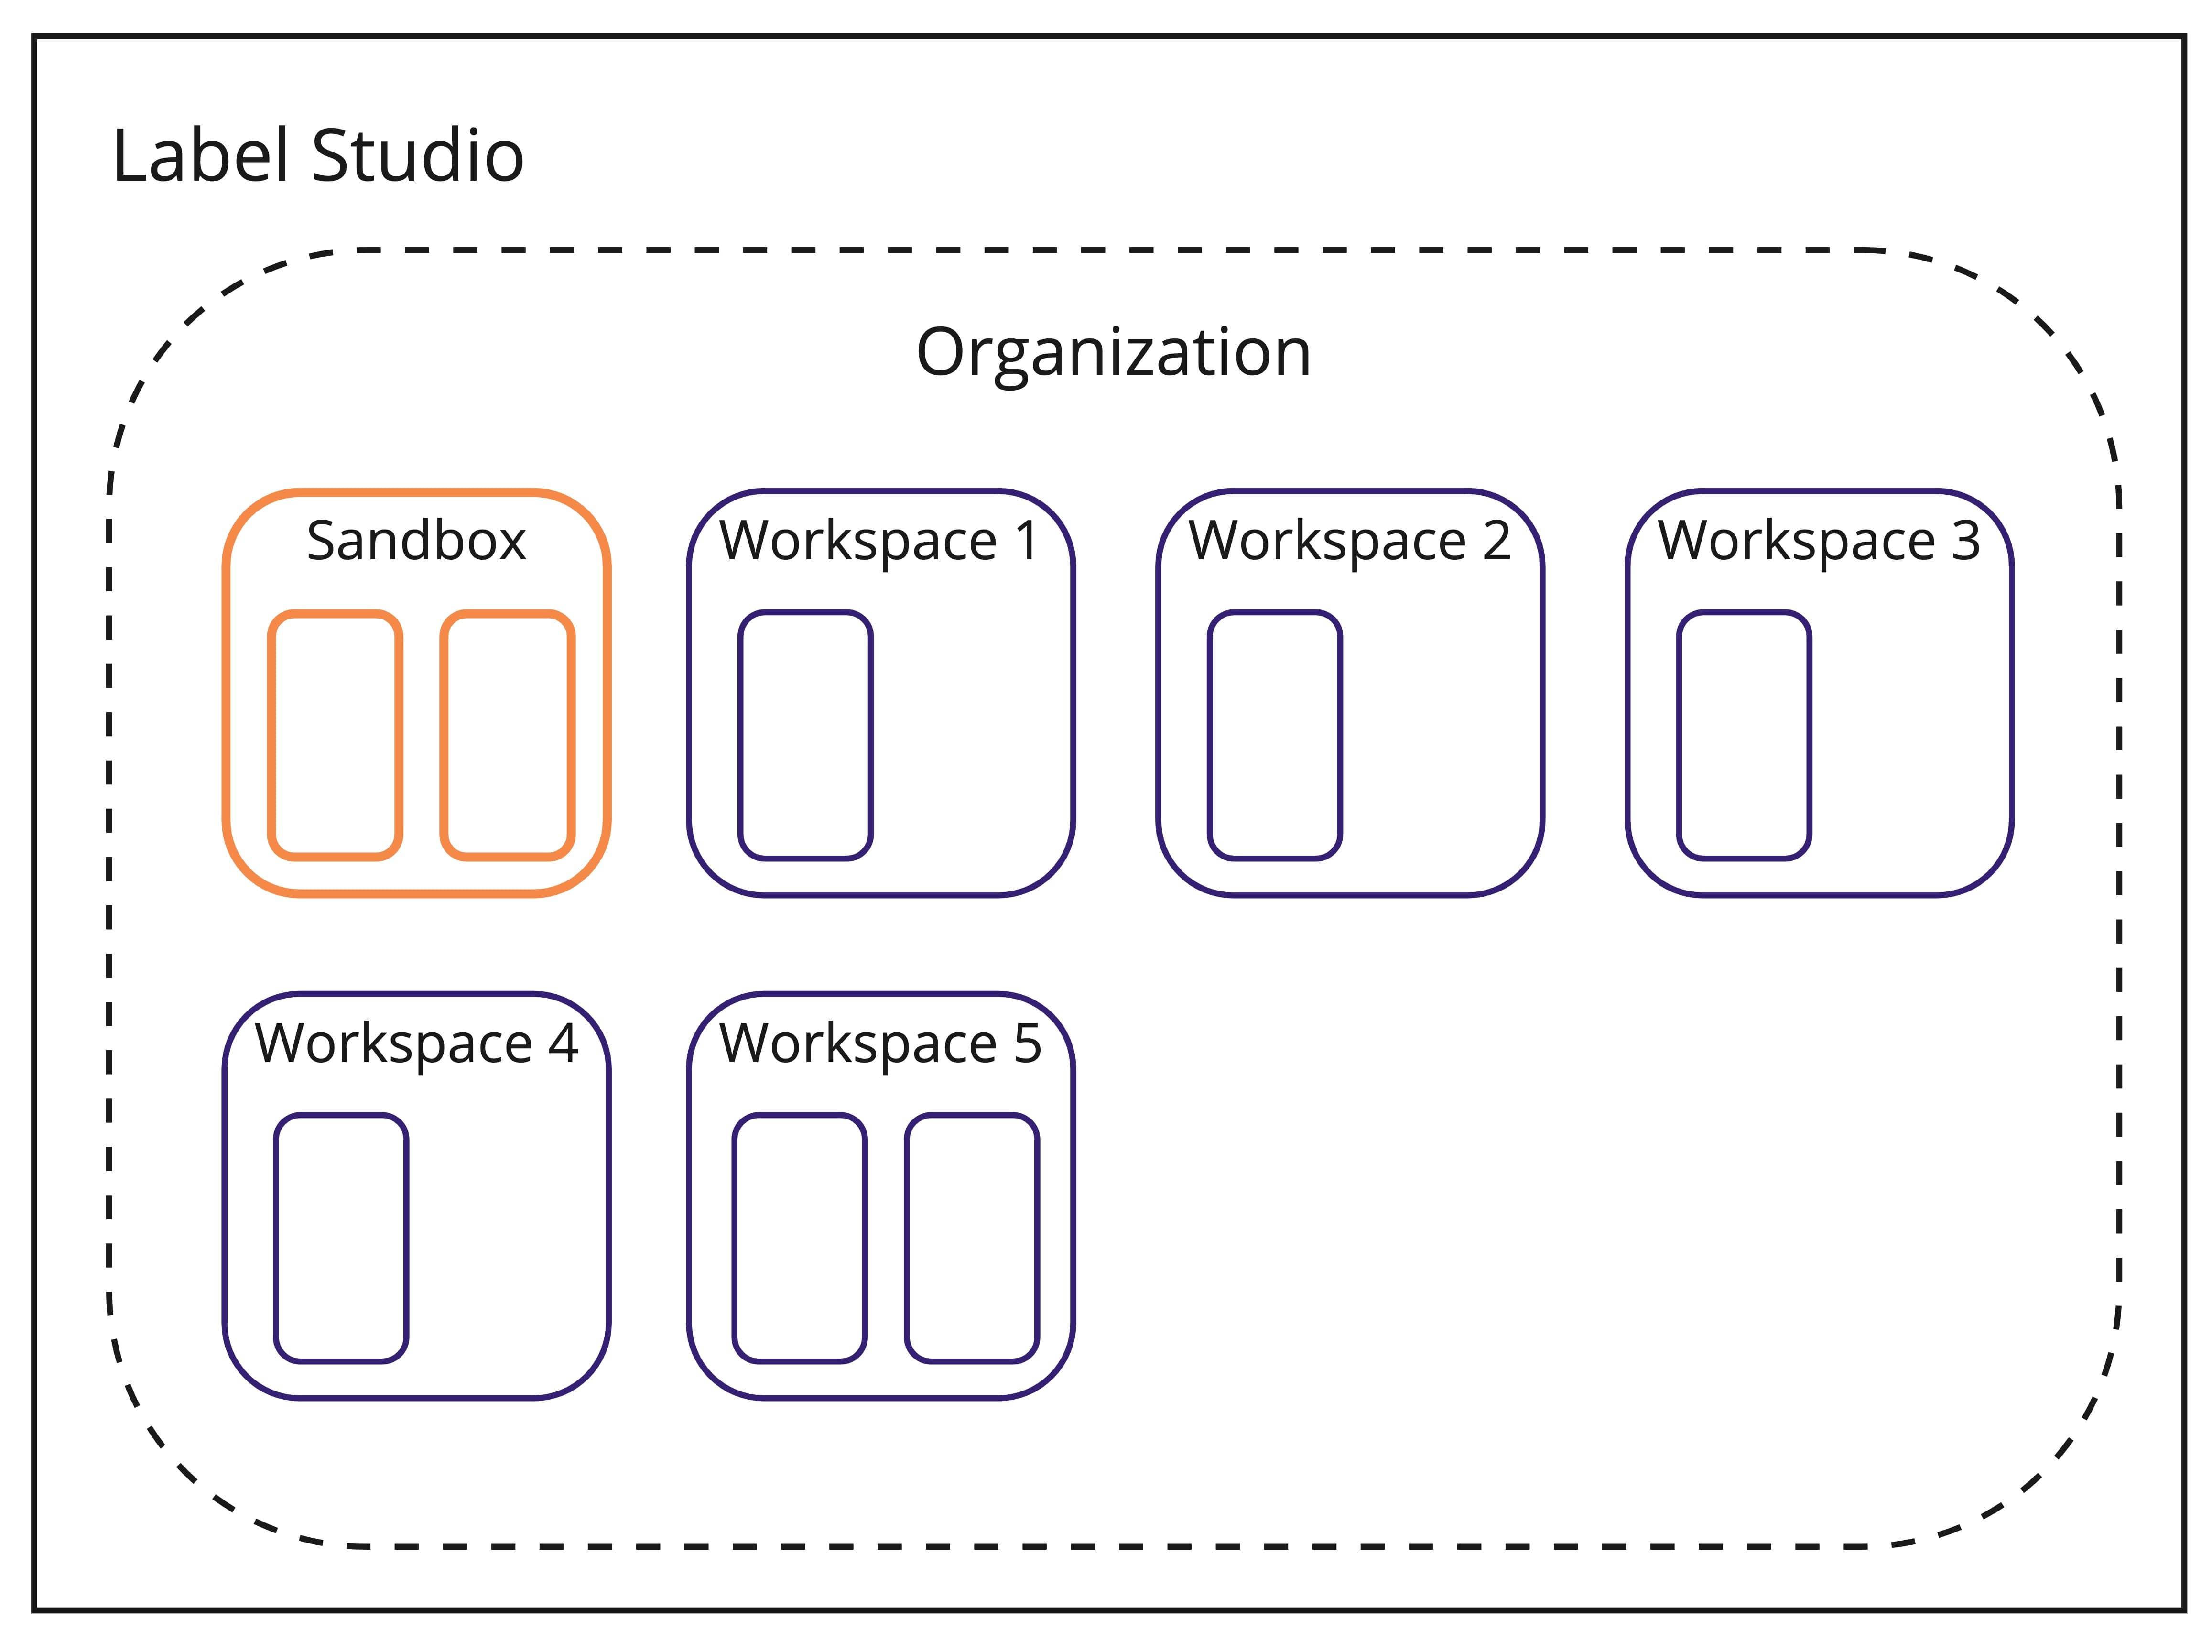 Figure 3: Label Studio with one organization with multiple workspaces and projects within each workspace.
Multiple organizations, such as one for the customer claims department and another for the customer support department, with specific workspaces in each organization for specific types of insurance, such as home insurance claims and auto insurance claims, and specific projects in each workspace for types of claims, such as Accident Claims, Injury Claims, Natural Disaster Claims. The Customer support organization might have workspaces specific to the types of support queues, with projects for specific types of calls received.
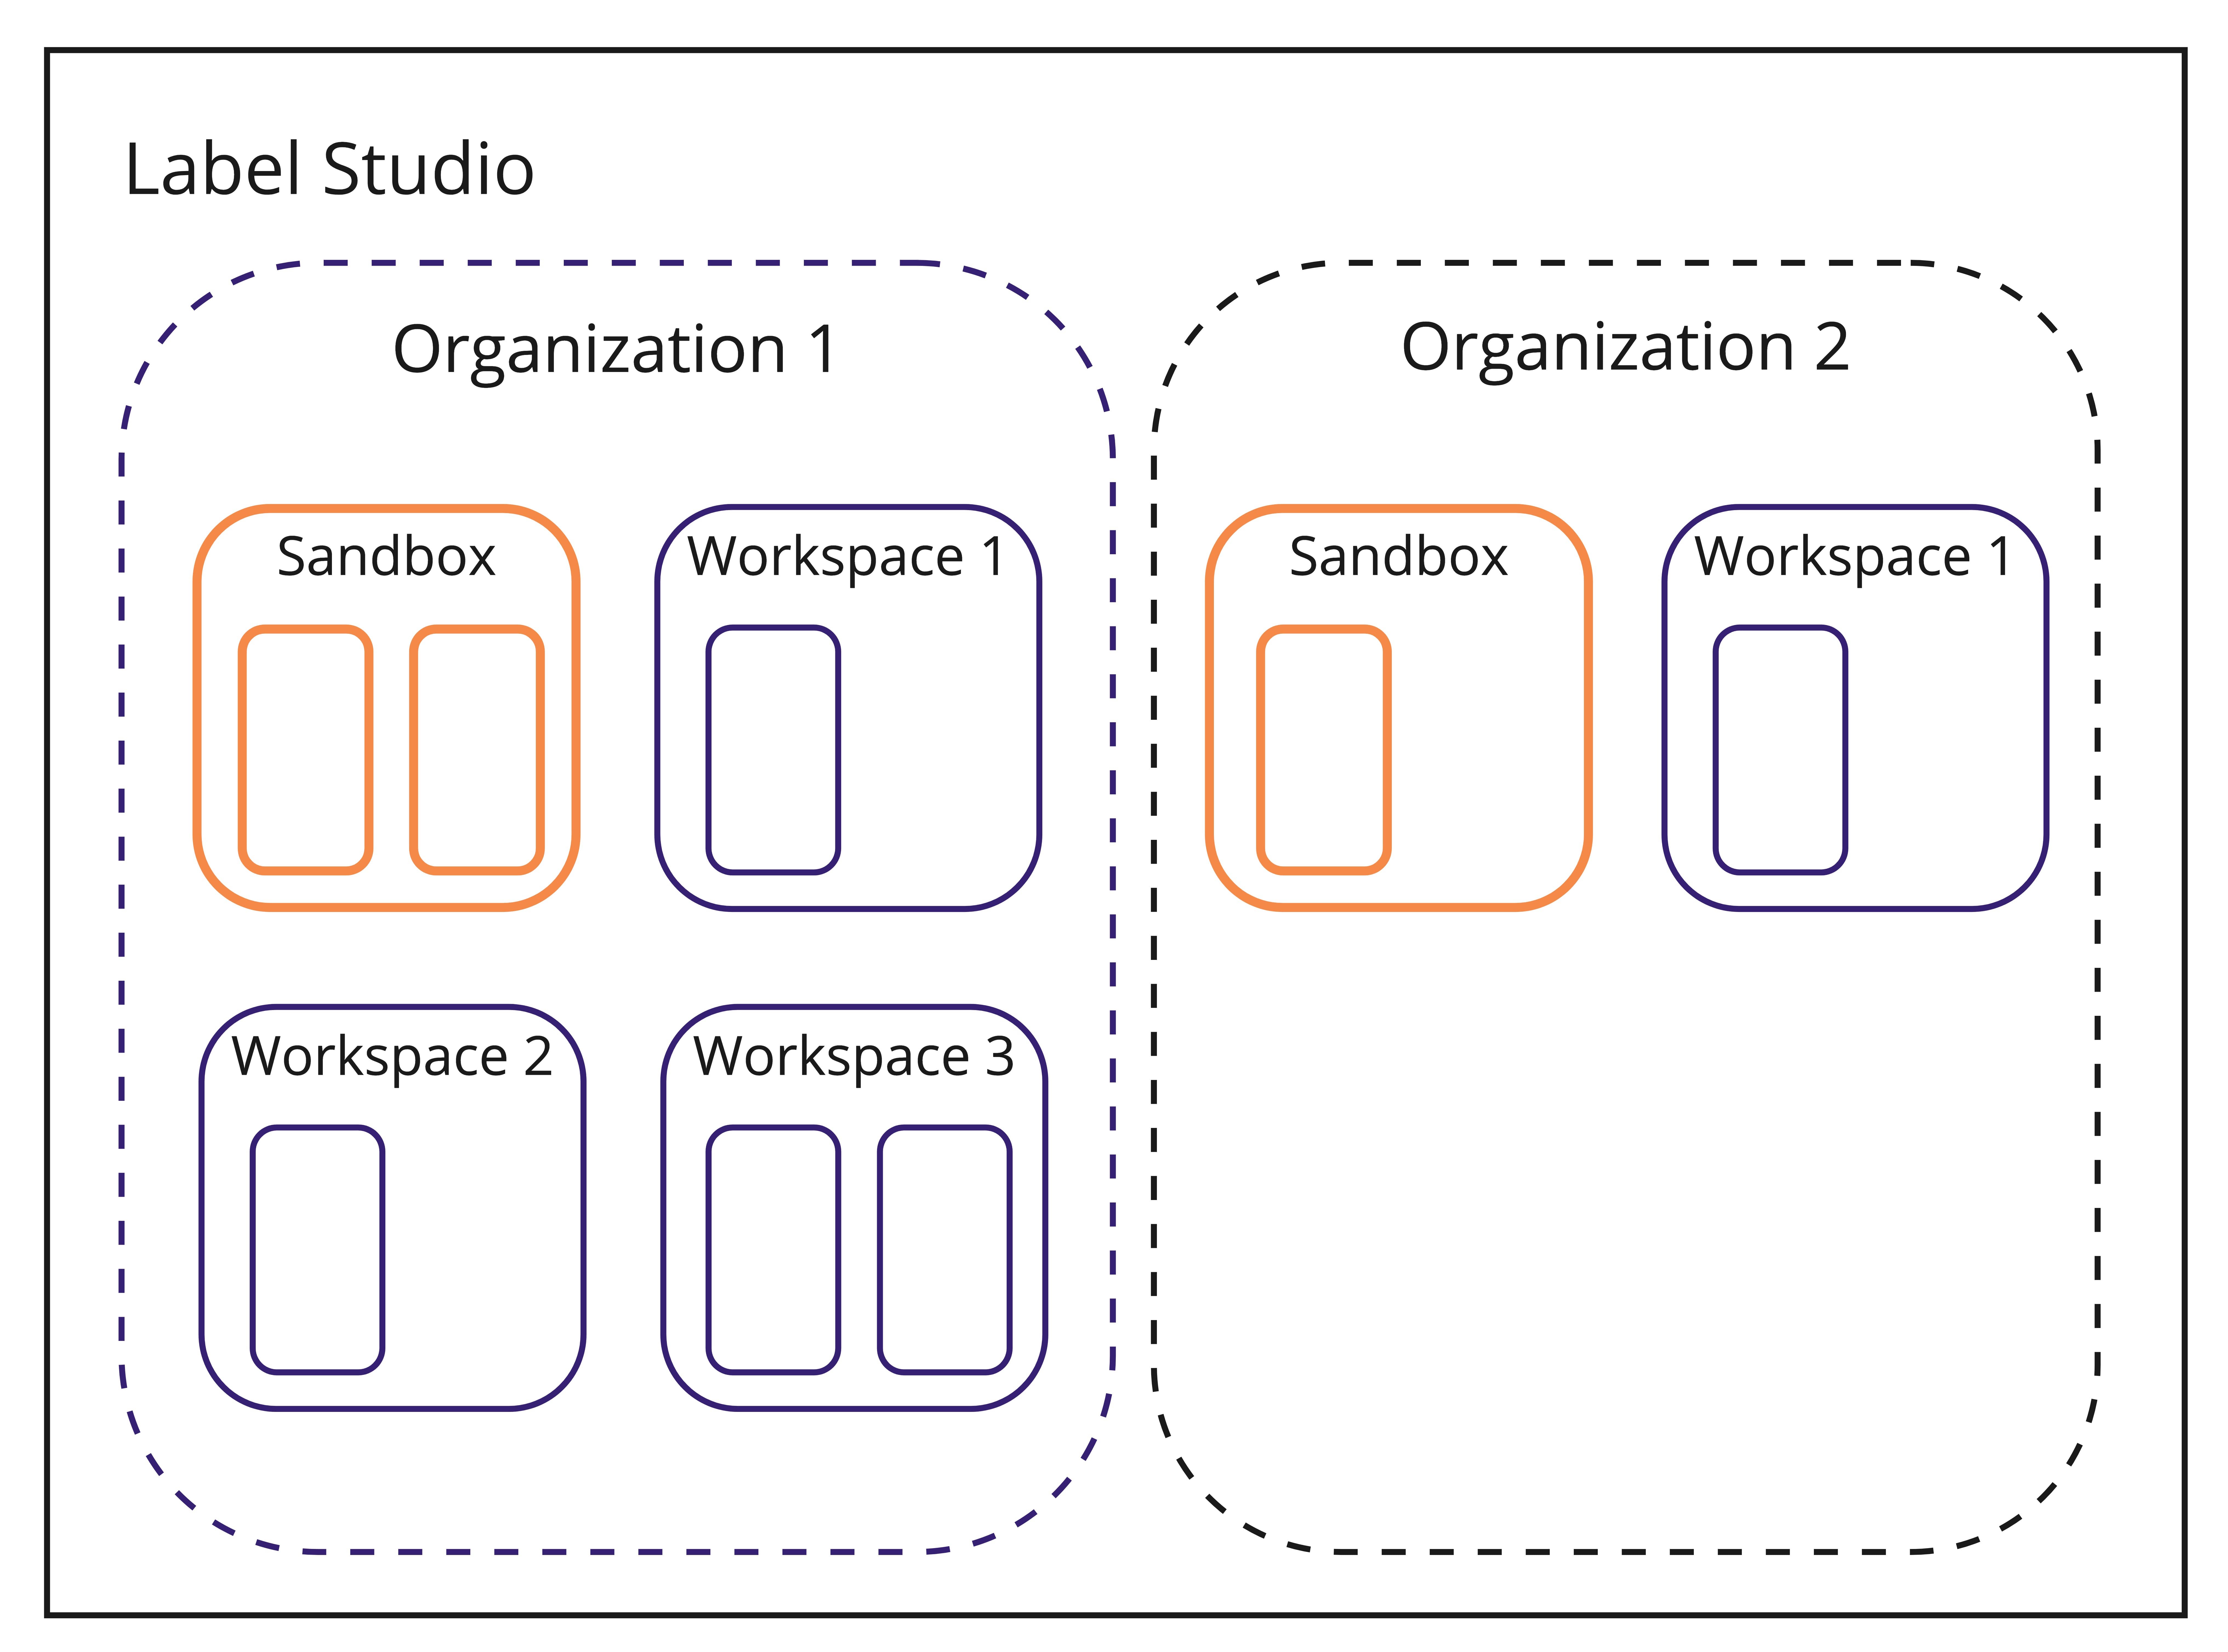 Figure 4: Label Studio with three organizations, each one with multiple workspaces and projects within each workspace.
When you assign a user role to an organization member, they hold that role for all workspaces and projects for that organization.
Managers within an organization can see all workspaces in that organization, even if they don’t have access to perform actions in them. Annotators and reviewers can only see projects, not workspaces.
If you have access to multiple organizations, use the Organizations page to switch between the organizations that you are a member of.
Create workspaces to organize projects
Within an organization, owners, administrators, and managers can create and manage workspaces. Workspace managers can only manage workspaces that they create or have been added to.
Create a workspace to organize projects by doing the following:
In the Label Studio UI, click the
+sign next to Workspaces in the menu.
Figure 5: Click the **+** sign.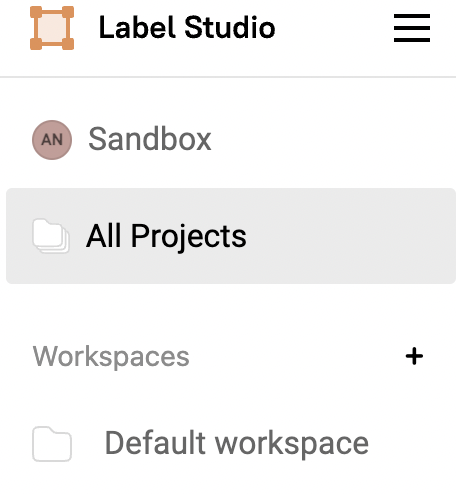
Name the workspace, and if you want, select a color.
Click Save.
Figure 6: Name the workspace.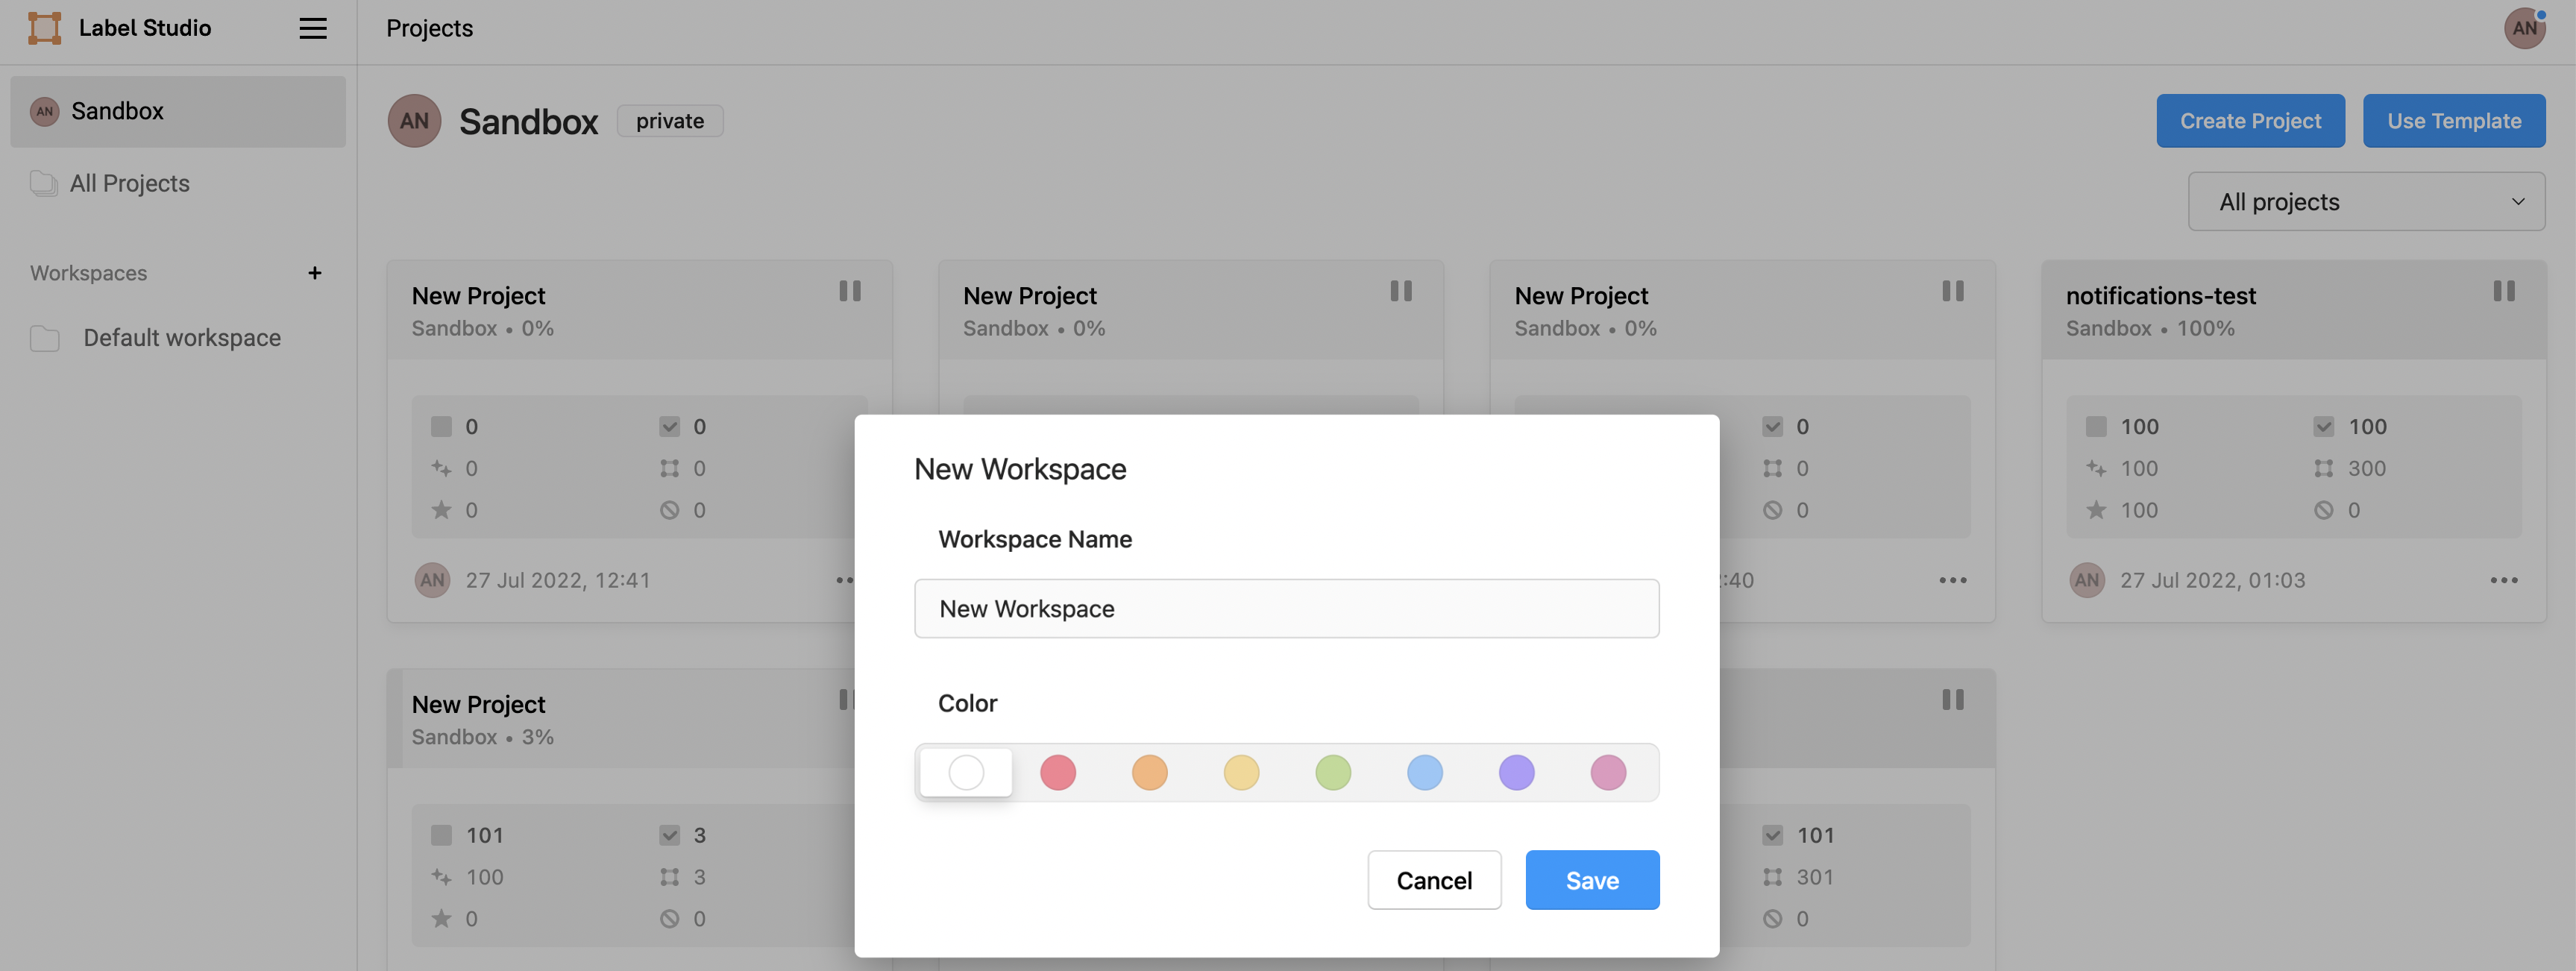
After creating a workspace, you can create projects for that workspace, or use the Project Settings page to move a project to the new workspace. Your private sandbox also functions as a workspace, but only you can see projects in your sandbox.
Add or remove members to a workspace
From a specific workspace inside the Label Studio UI, do the following:
- Click Manage Members.
- Use the search functionality to locate the user that you want to add to the workspace.
- Select the checkbox next to their name and click the
>arrow so that they appear in the list of users that Belong to the Workspace. - Click Save.
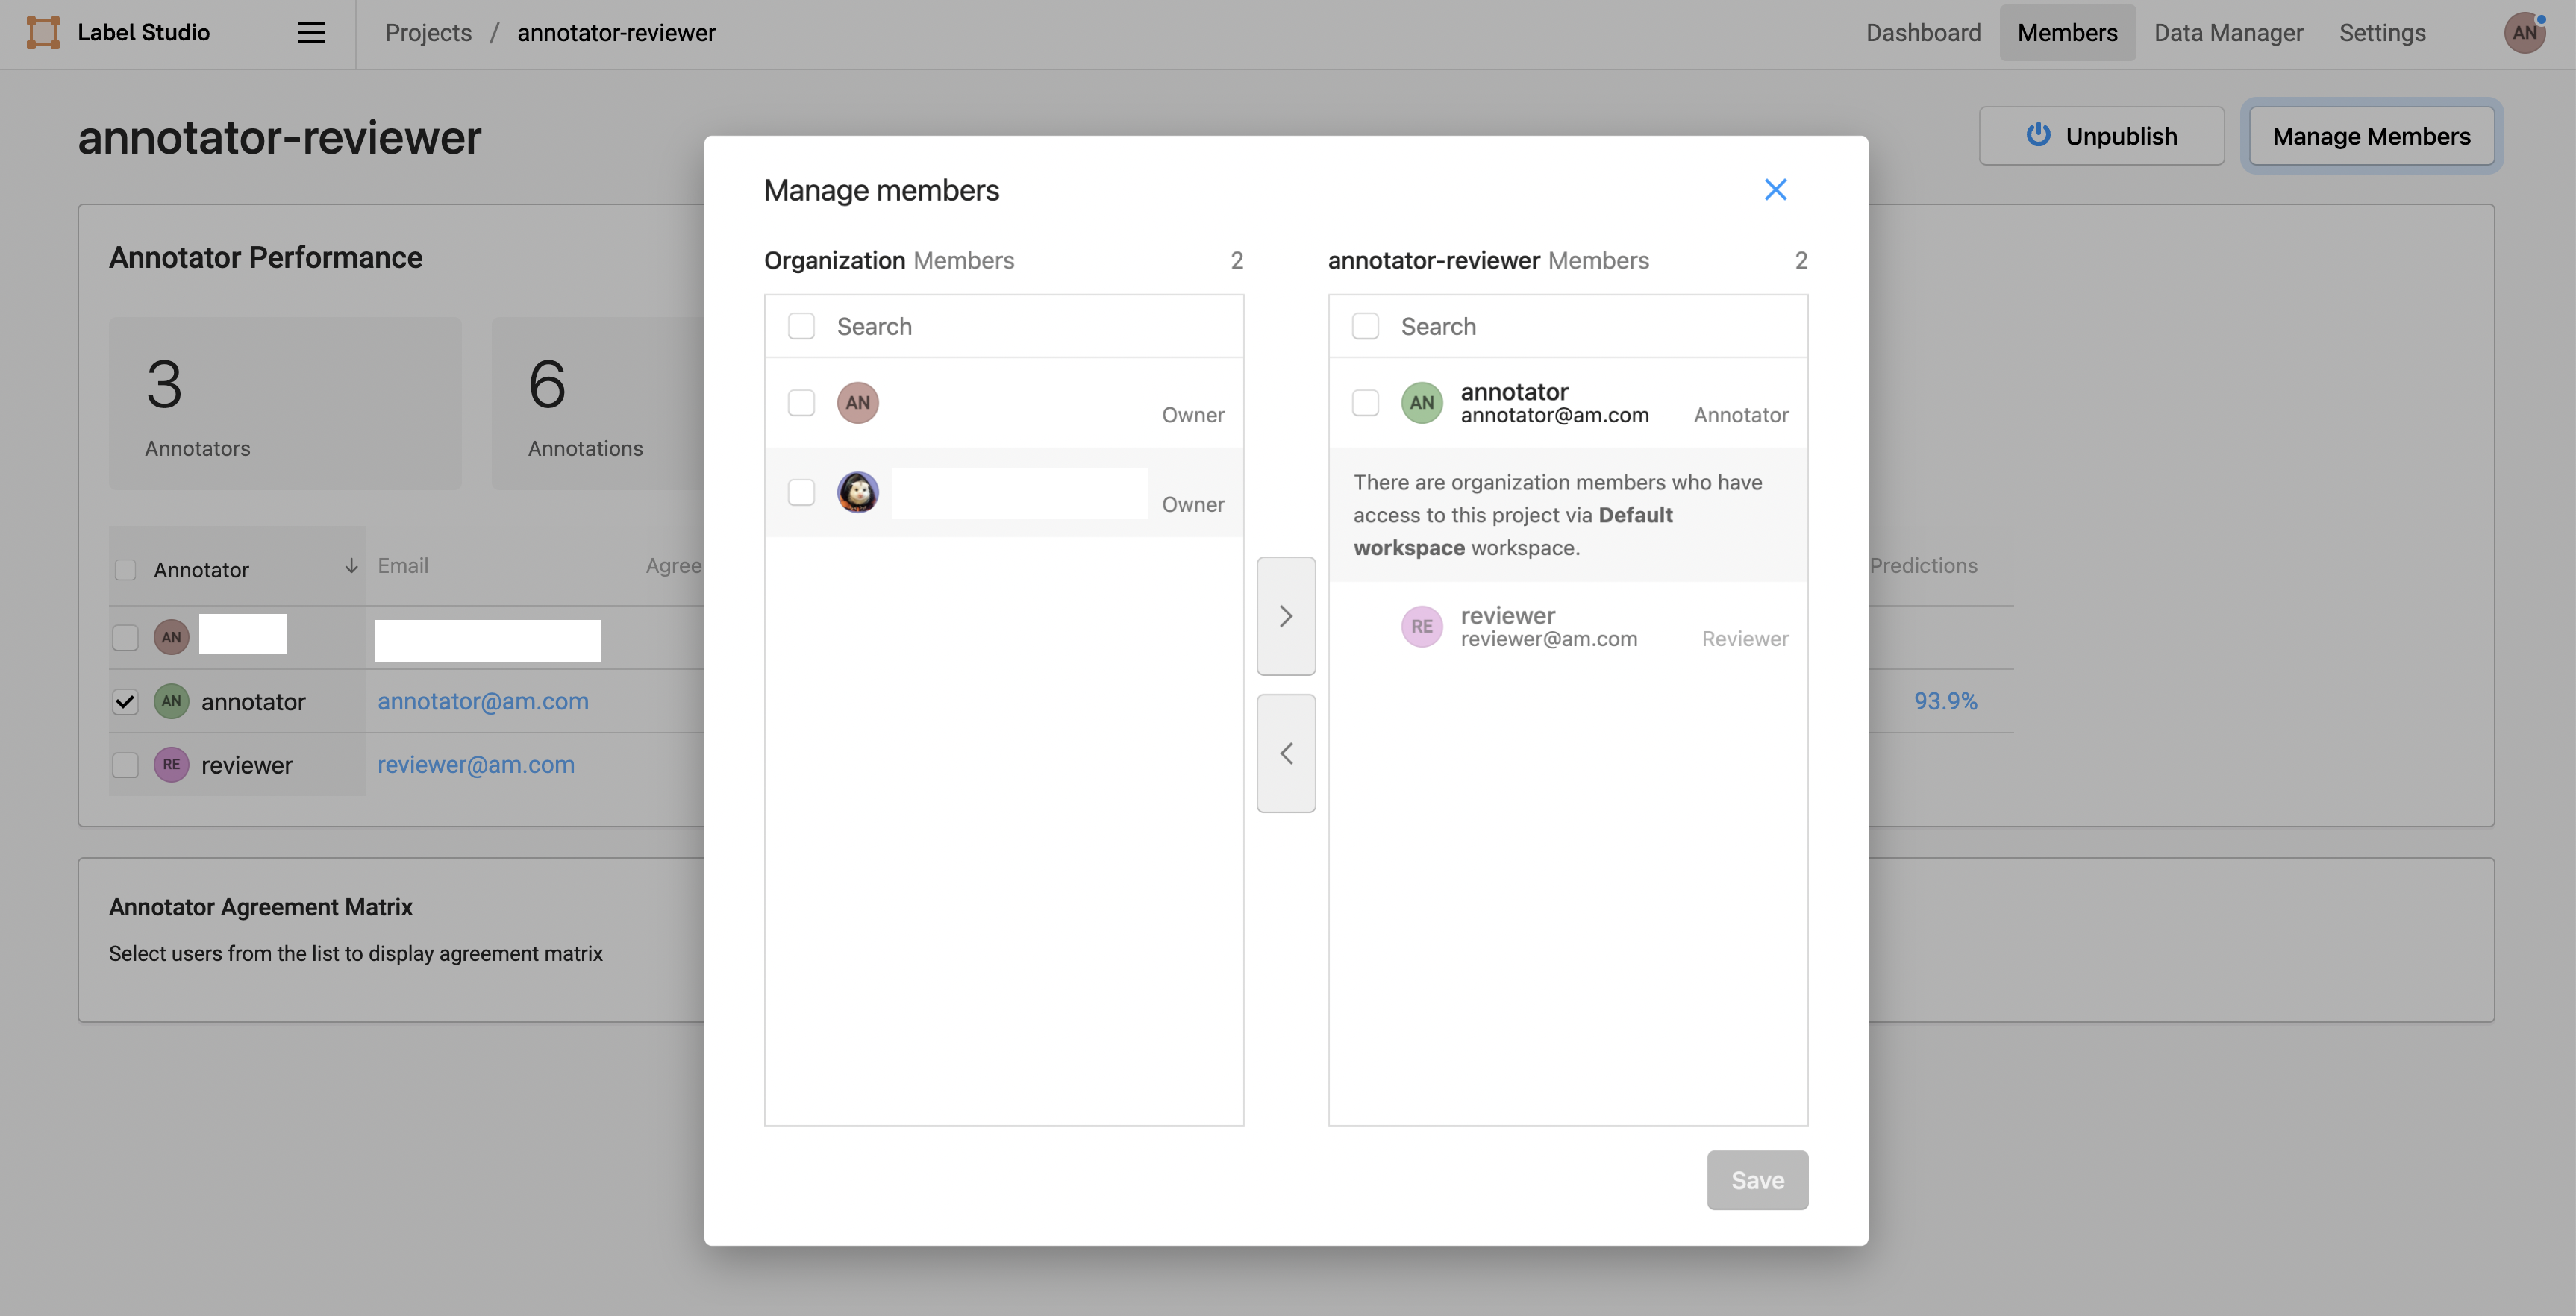
You can also remove yourself or other members from a workspace by following the same process and removing members with the < arrow.
Sandbox workspace
Each user has a personal Sandbox workspace that they can use to experiment with project settings and get familiar with Label Studio. After you set up a project and want others to collaborate on it with you, you can update the project workspace in the Project Settings. You cannot add members to your Sandbox workspace.
More menu to Pin or Unpin and Duplicate projects
Use the more menu (three dots (…) located in the bottom-right of each project card) to explore the following features:
Pin or Unpin projects
You can pin a project to the top of the page and unpin a project too. The Pin project and Unpin project feature allows you to filter and find projects of interest.
Roles and Capabilities
This section describes the user roles and capable actions on the Pin project and Unpin project feature by using the Label studio UI.
As an Organization Admin and Reviewer in Label Studio UI, you can do the following:
- View all your pinned projects.
- View all the pinned projects by other administrators.
- Aware that a project is pinned because of the label in the project card.
- Unpin a pinned project from the menu on the card.
- Pin an unpinned project from the menu on the card.
- See a temporary notification about the action that you have performed.
- While the notification is visible, you have the ability to undo the action.
- Pin an unpinned project.
- Aware that you pinned a project because it will display at the beginning of the list.
- Aware that a project is pinned because the label will be visible on the card.
- View all projects by selecting the option in the filter.
- The display order shows the pinned projects first, then all other projects.
- Paginate through pinned and unpinned projects.
- If filter is applied to view pinned projects, they will display first in order.
- When you paginate and there are not enough pinned projects to display, you will see all other projects.
- View projects by workspace, including projects that you and other administrators have pinned.
note
If there are no available pinned projects, all other projects will display.
As an Annotator in Label Studio UI, you can do the following:
- View projects that have been pinned by people with permissions.
- Cannot manage pinning or unpinning projects.
- Filter projects.
- See when there are no pinned projects
- Support copy is not available because permissions are not granted to perform those actions.
To pin or unpin projects:
- In the Label Studio UI, click All Projects to see all the projects in one place.
- Click on the more menu (three dots … located in the bottom-right of each project card) to see the following options.
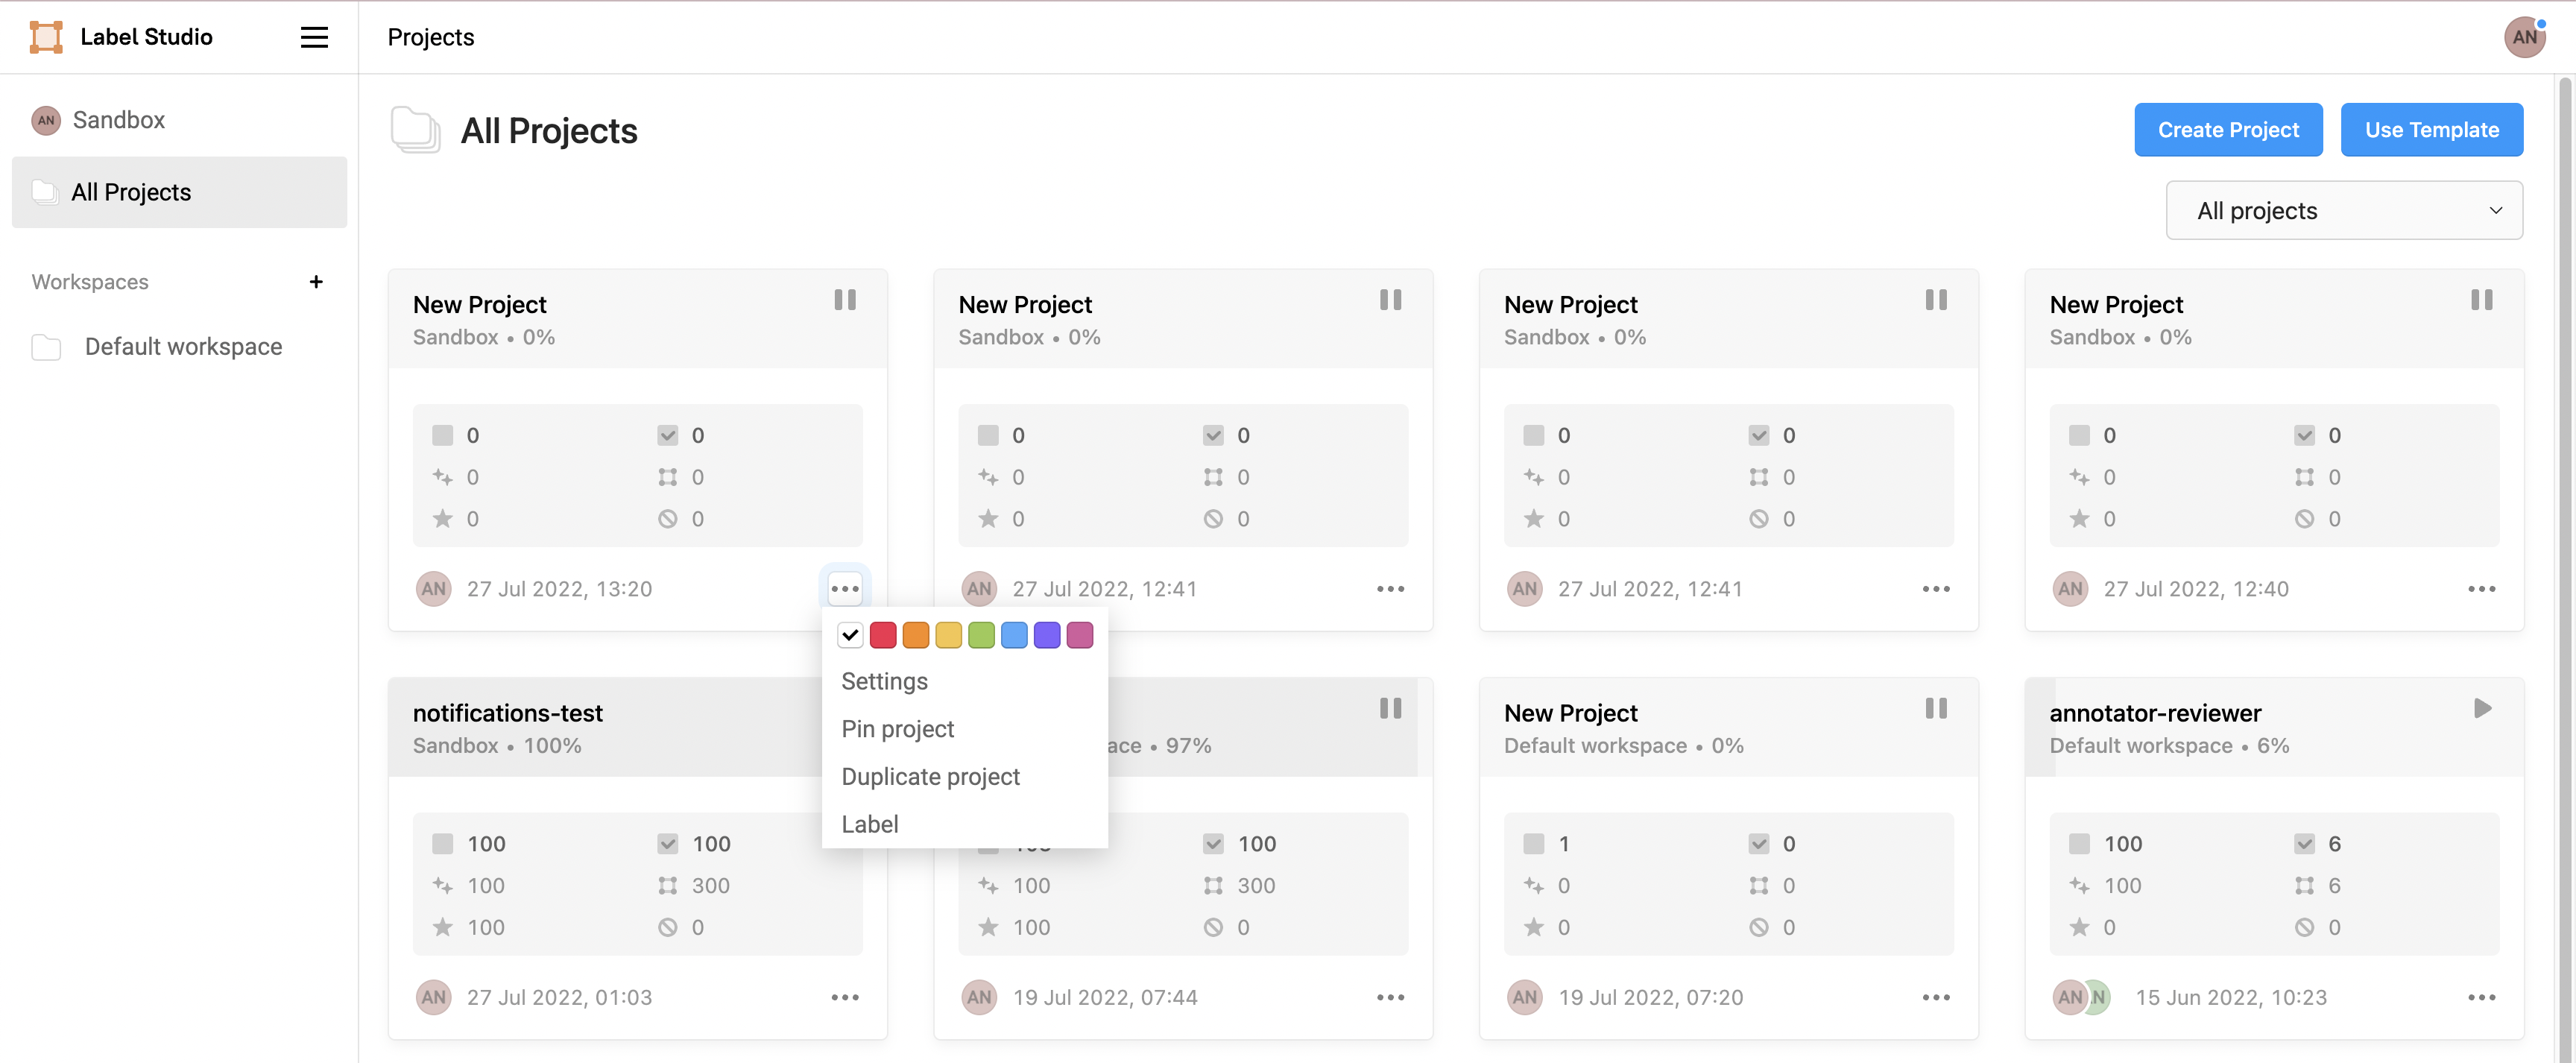
- Click Pin project to pin your projects.
Figure 9: Pin projects.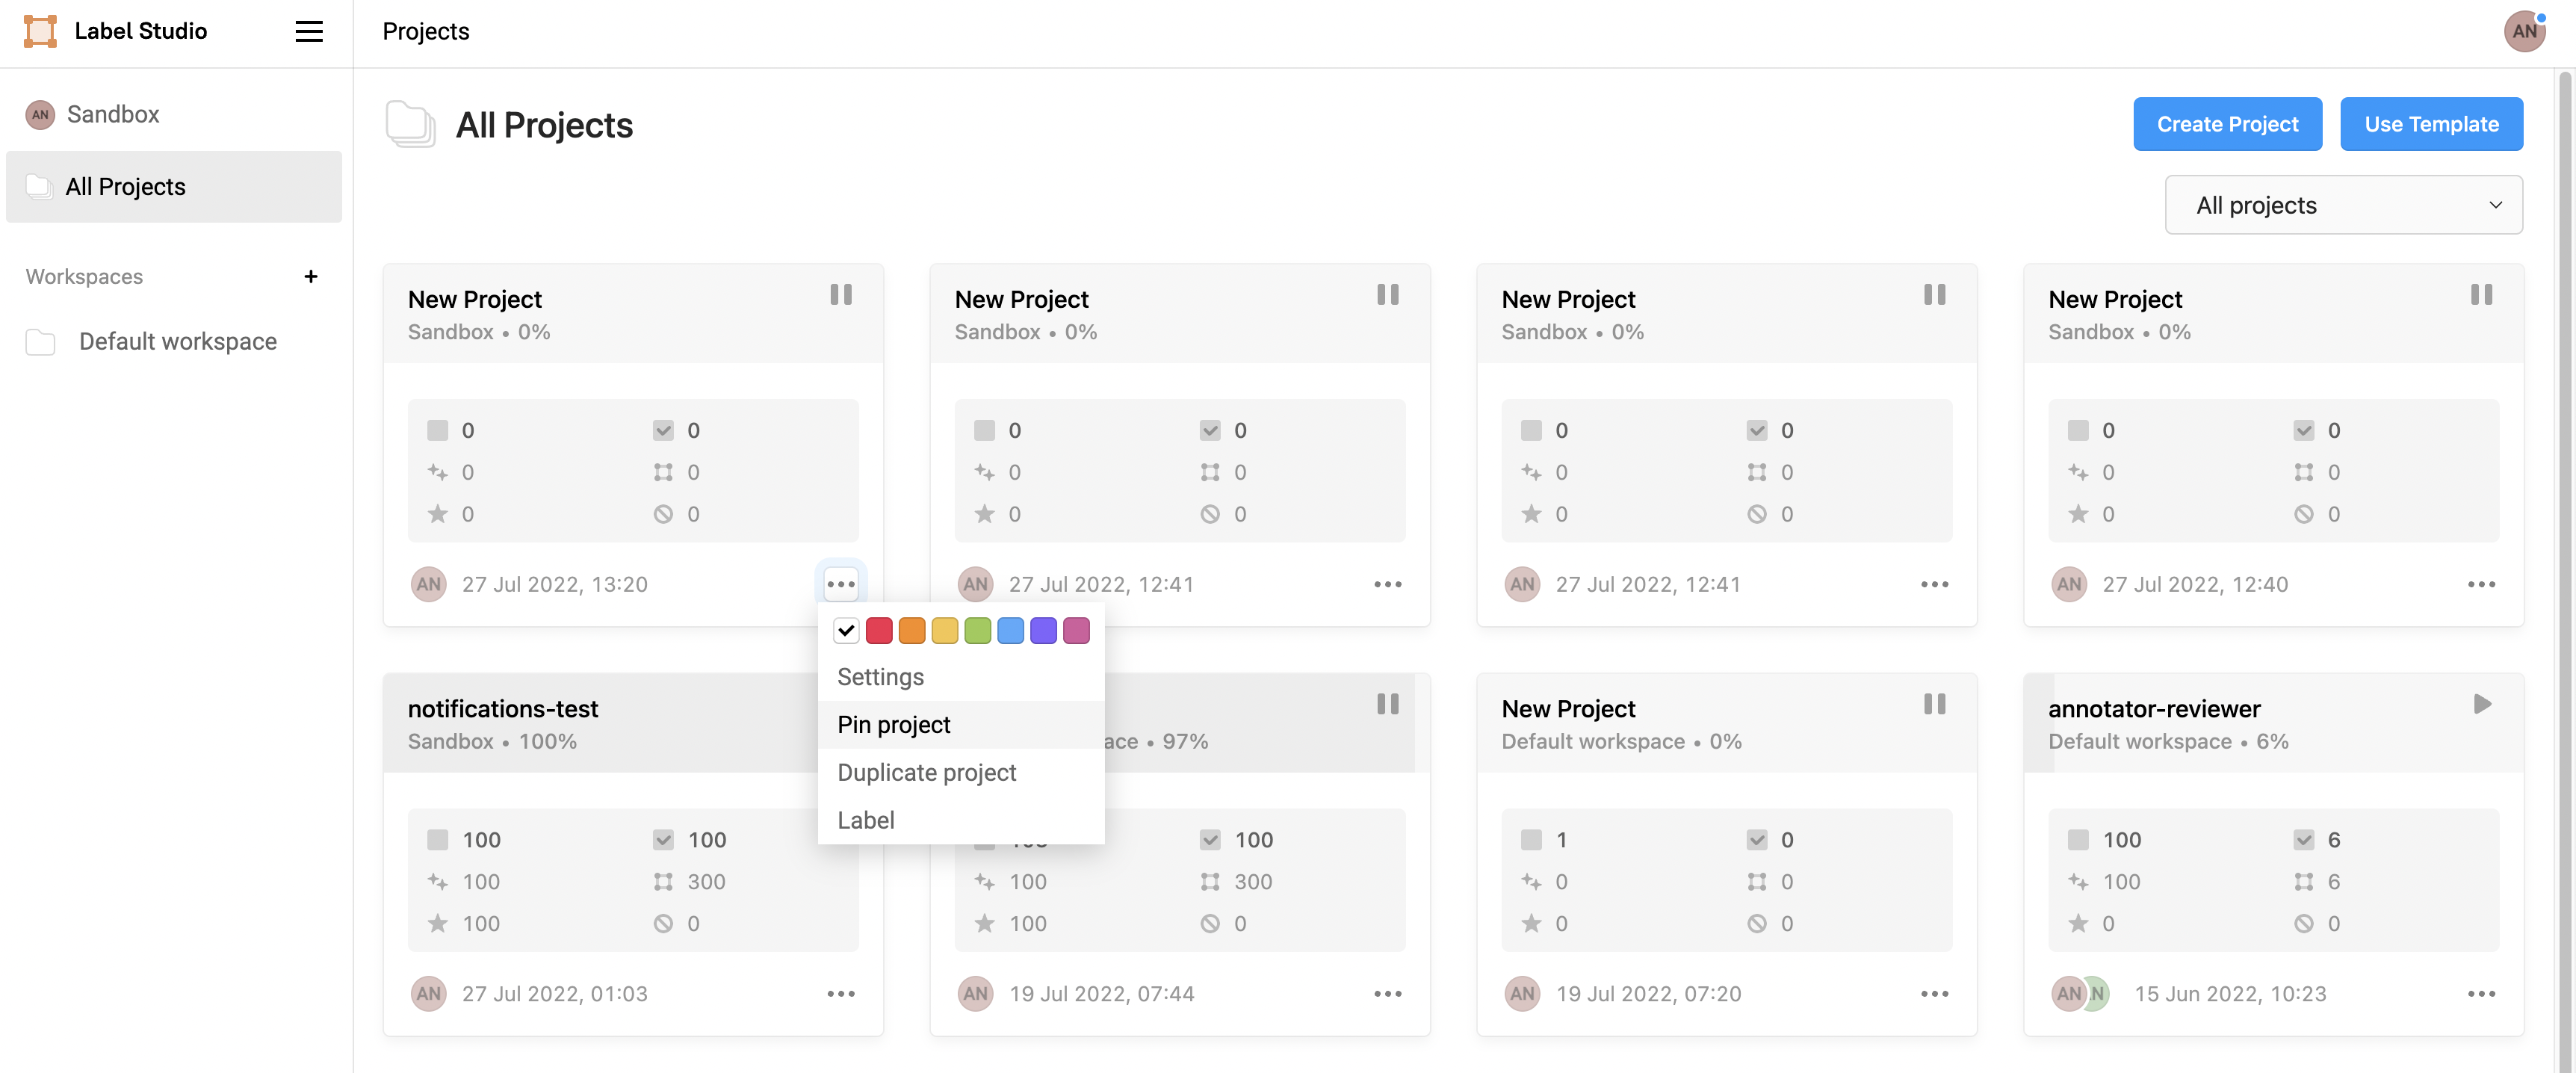
note
- When you pin a project, a message (for example,
New Project was pinned) is displayed at the bottom of the page to confirm that your project is pinned. - Click Undo near the message to undo this action.
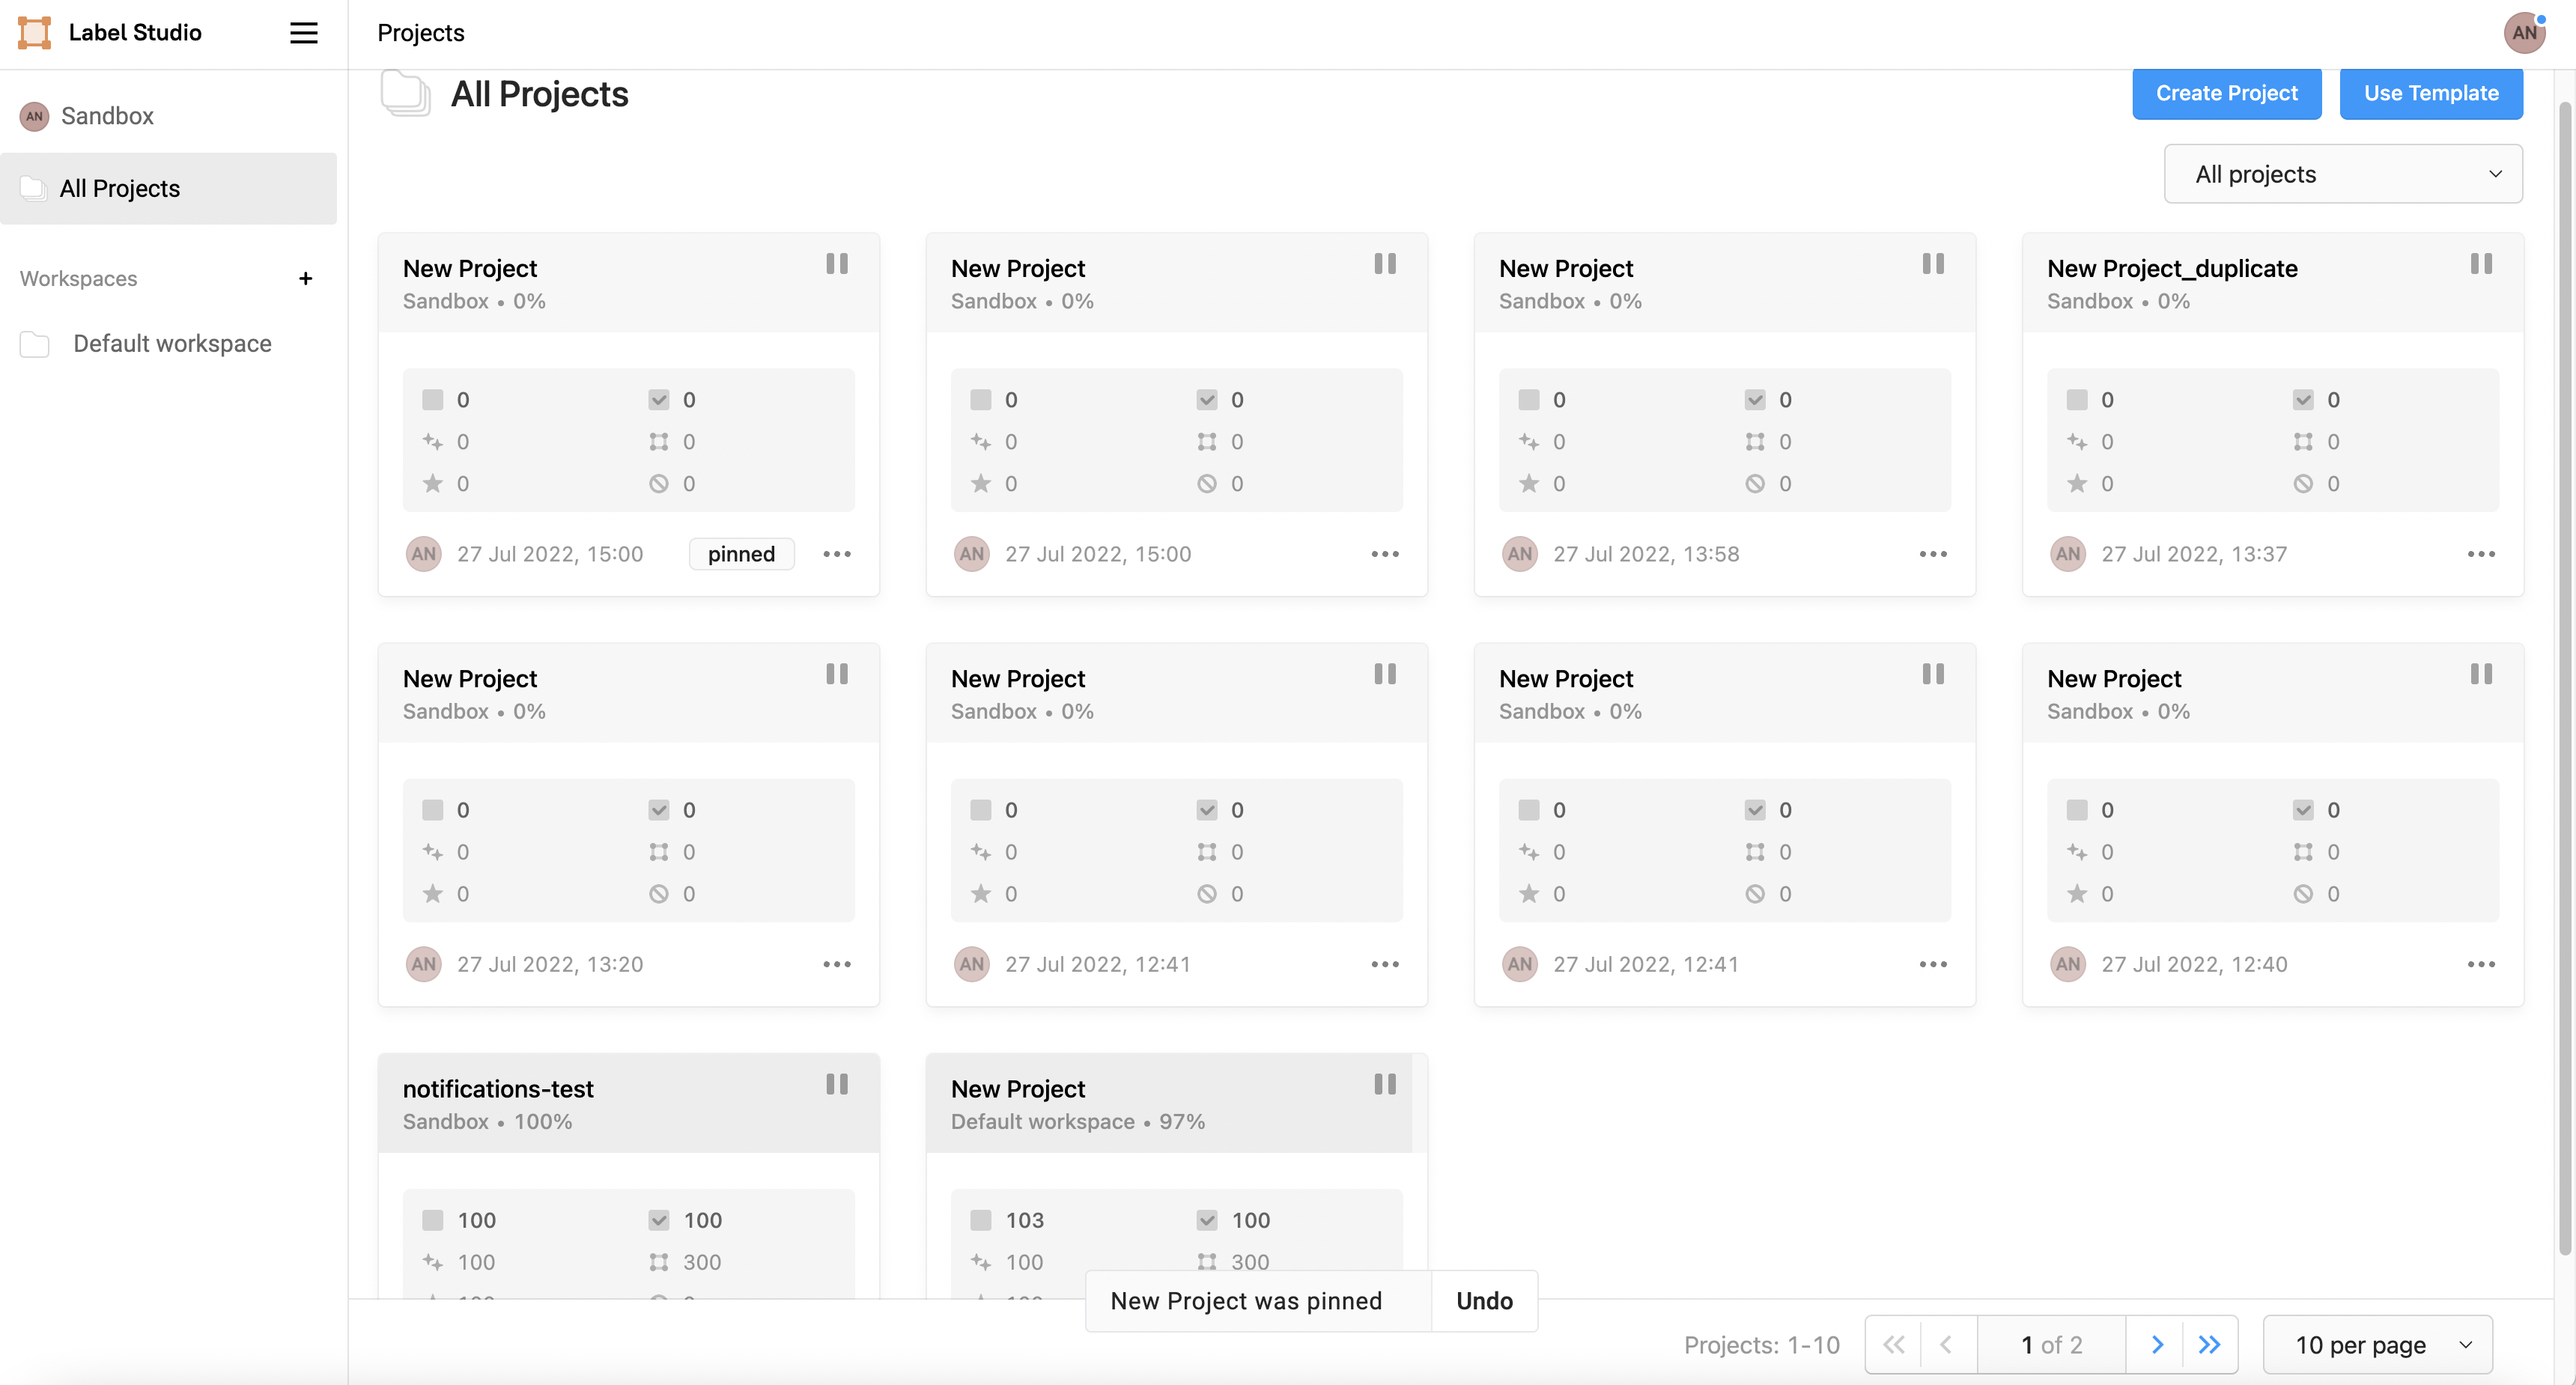
- To filter and display only the pinned projects, click Pinned projects on the top-right side drop-down list.

Now, you can see all the pinned projects only.
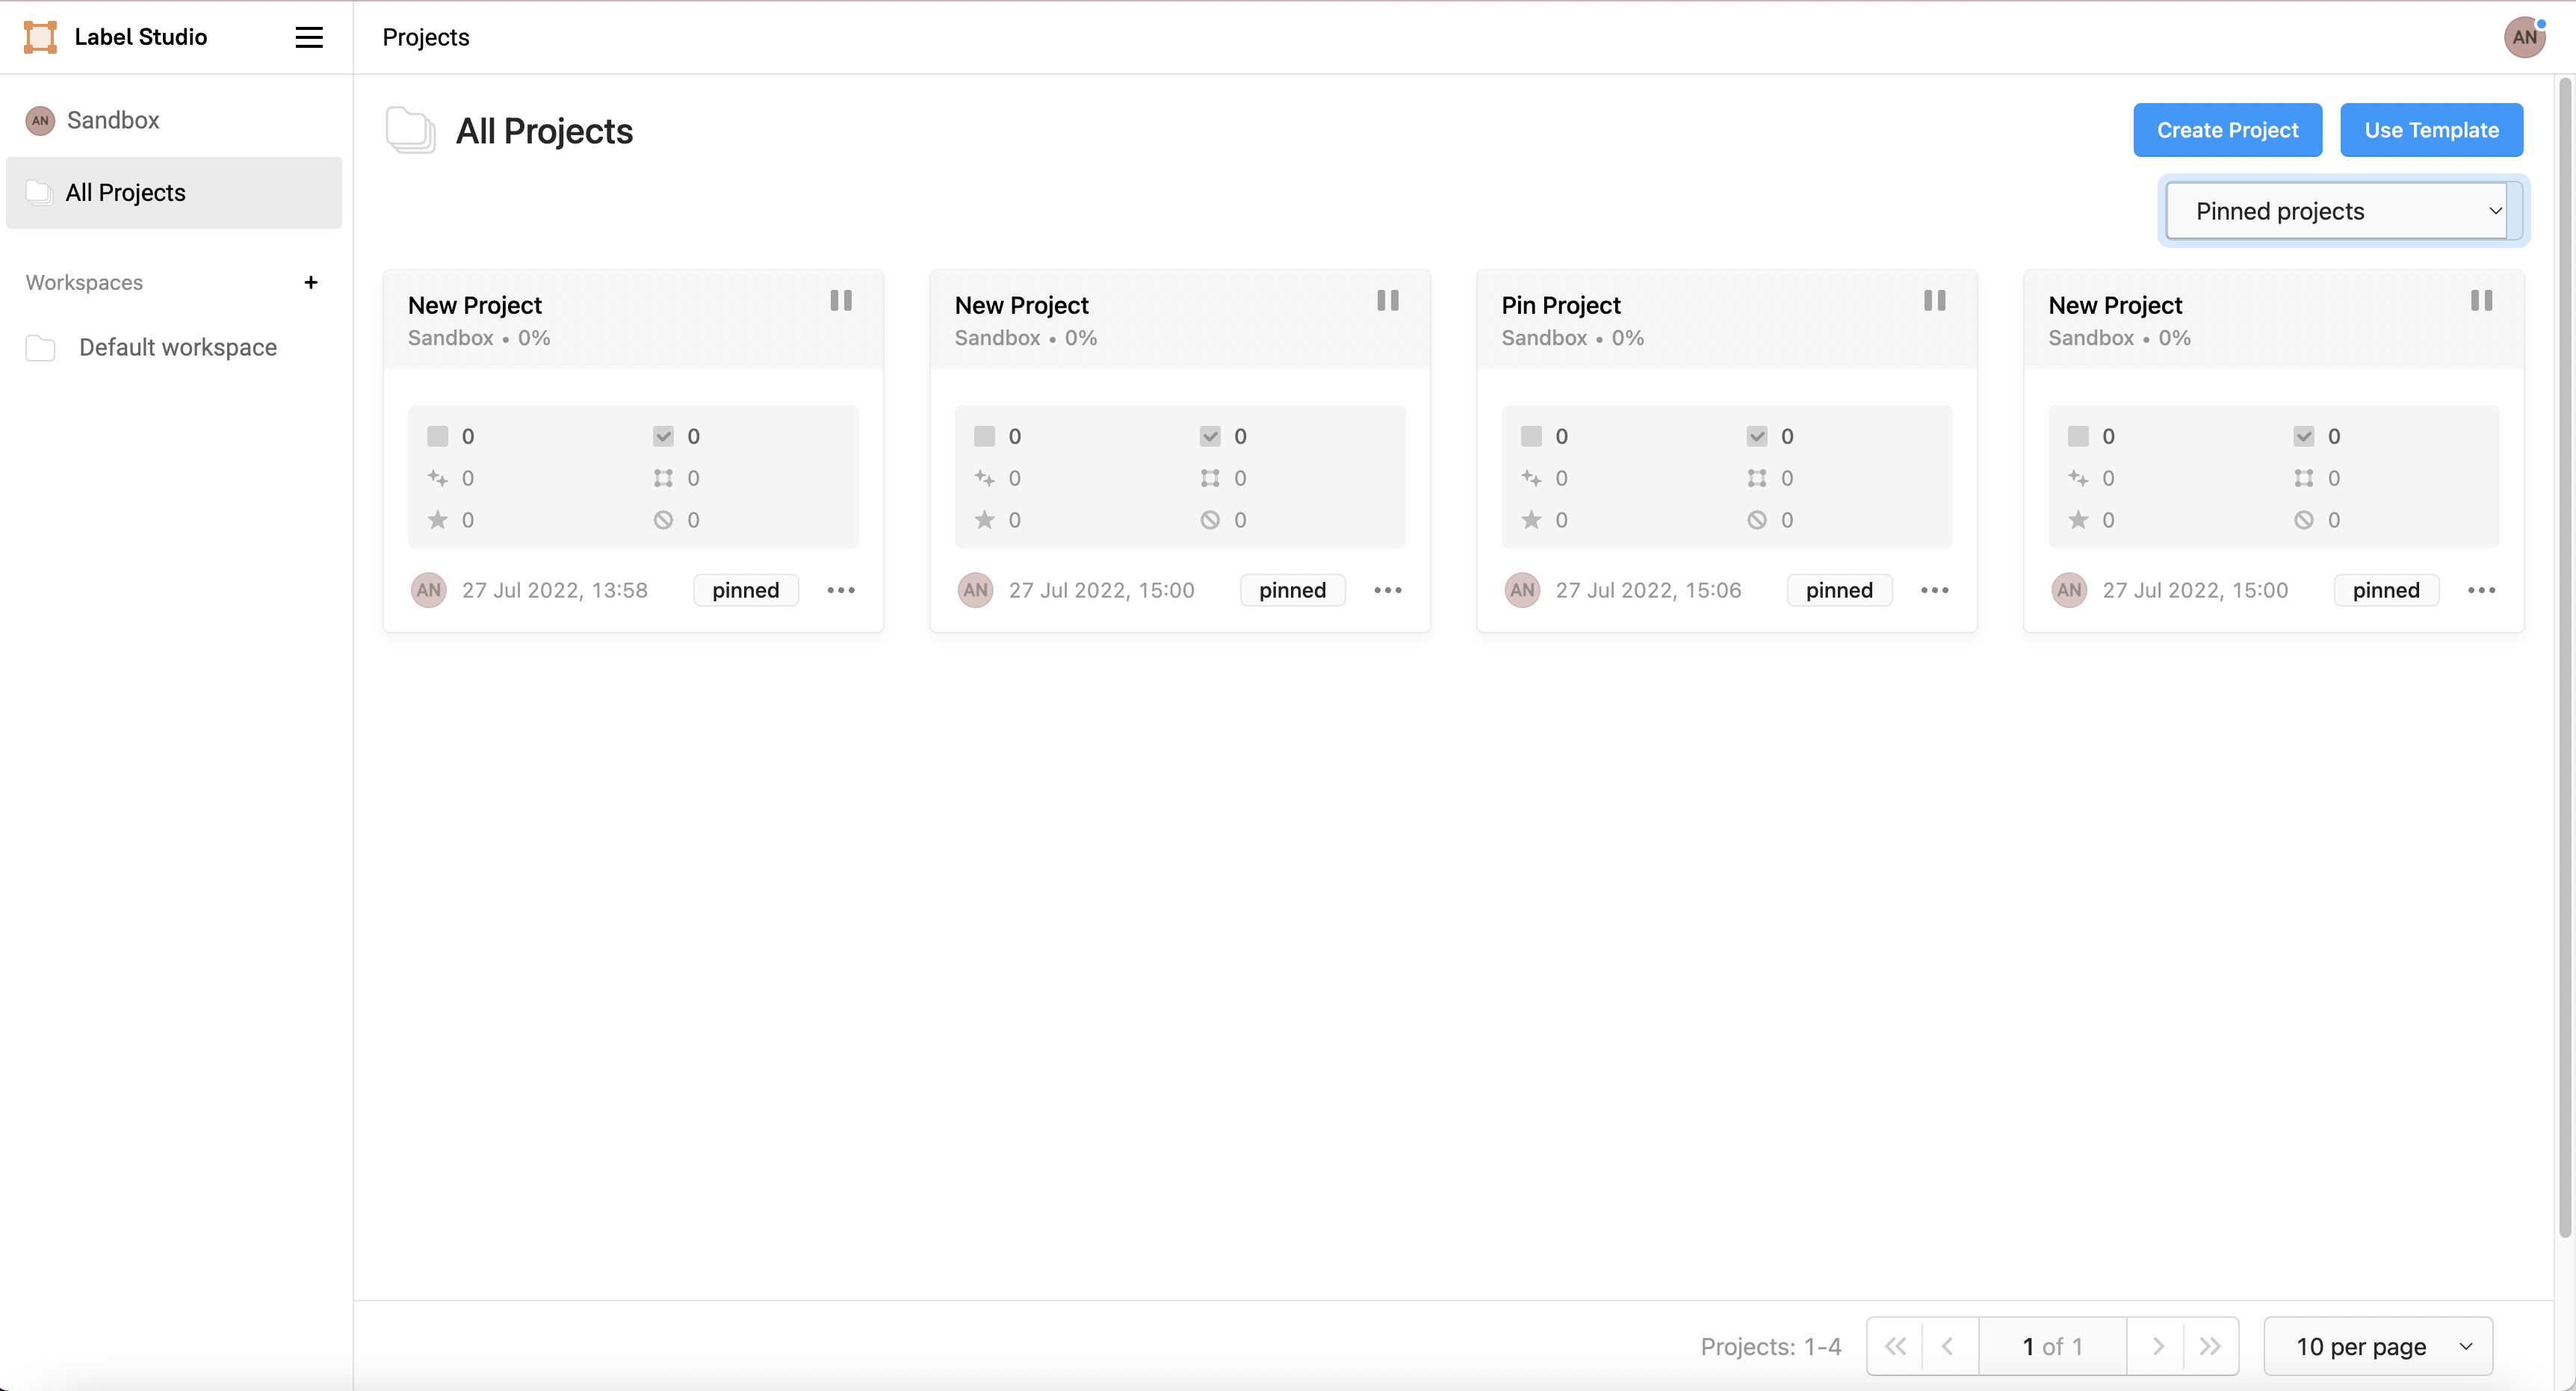
Figure 12: View only the pinned projects.
- To filter and display only the unpinned projects, click Unpinned projects on the top-right side drop-down list.
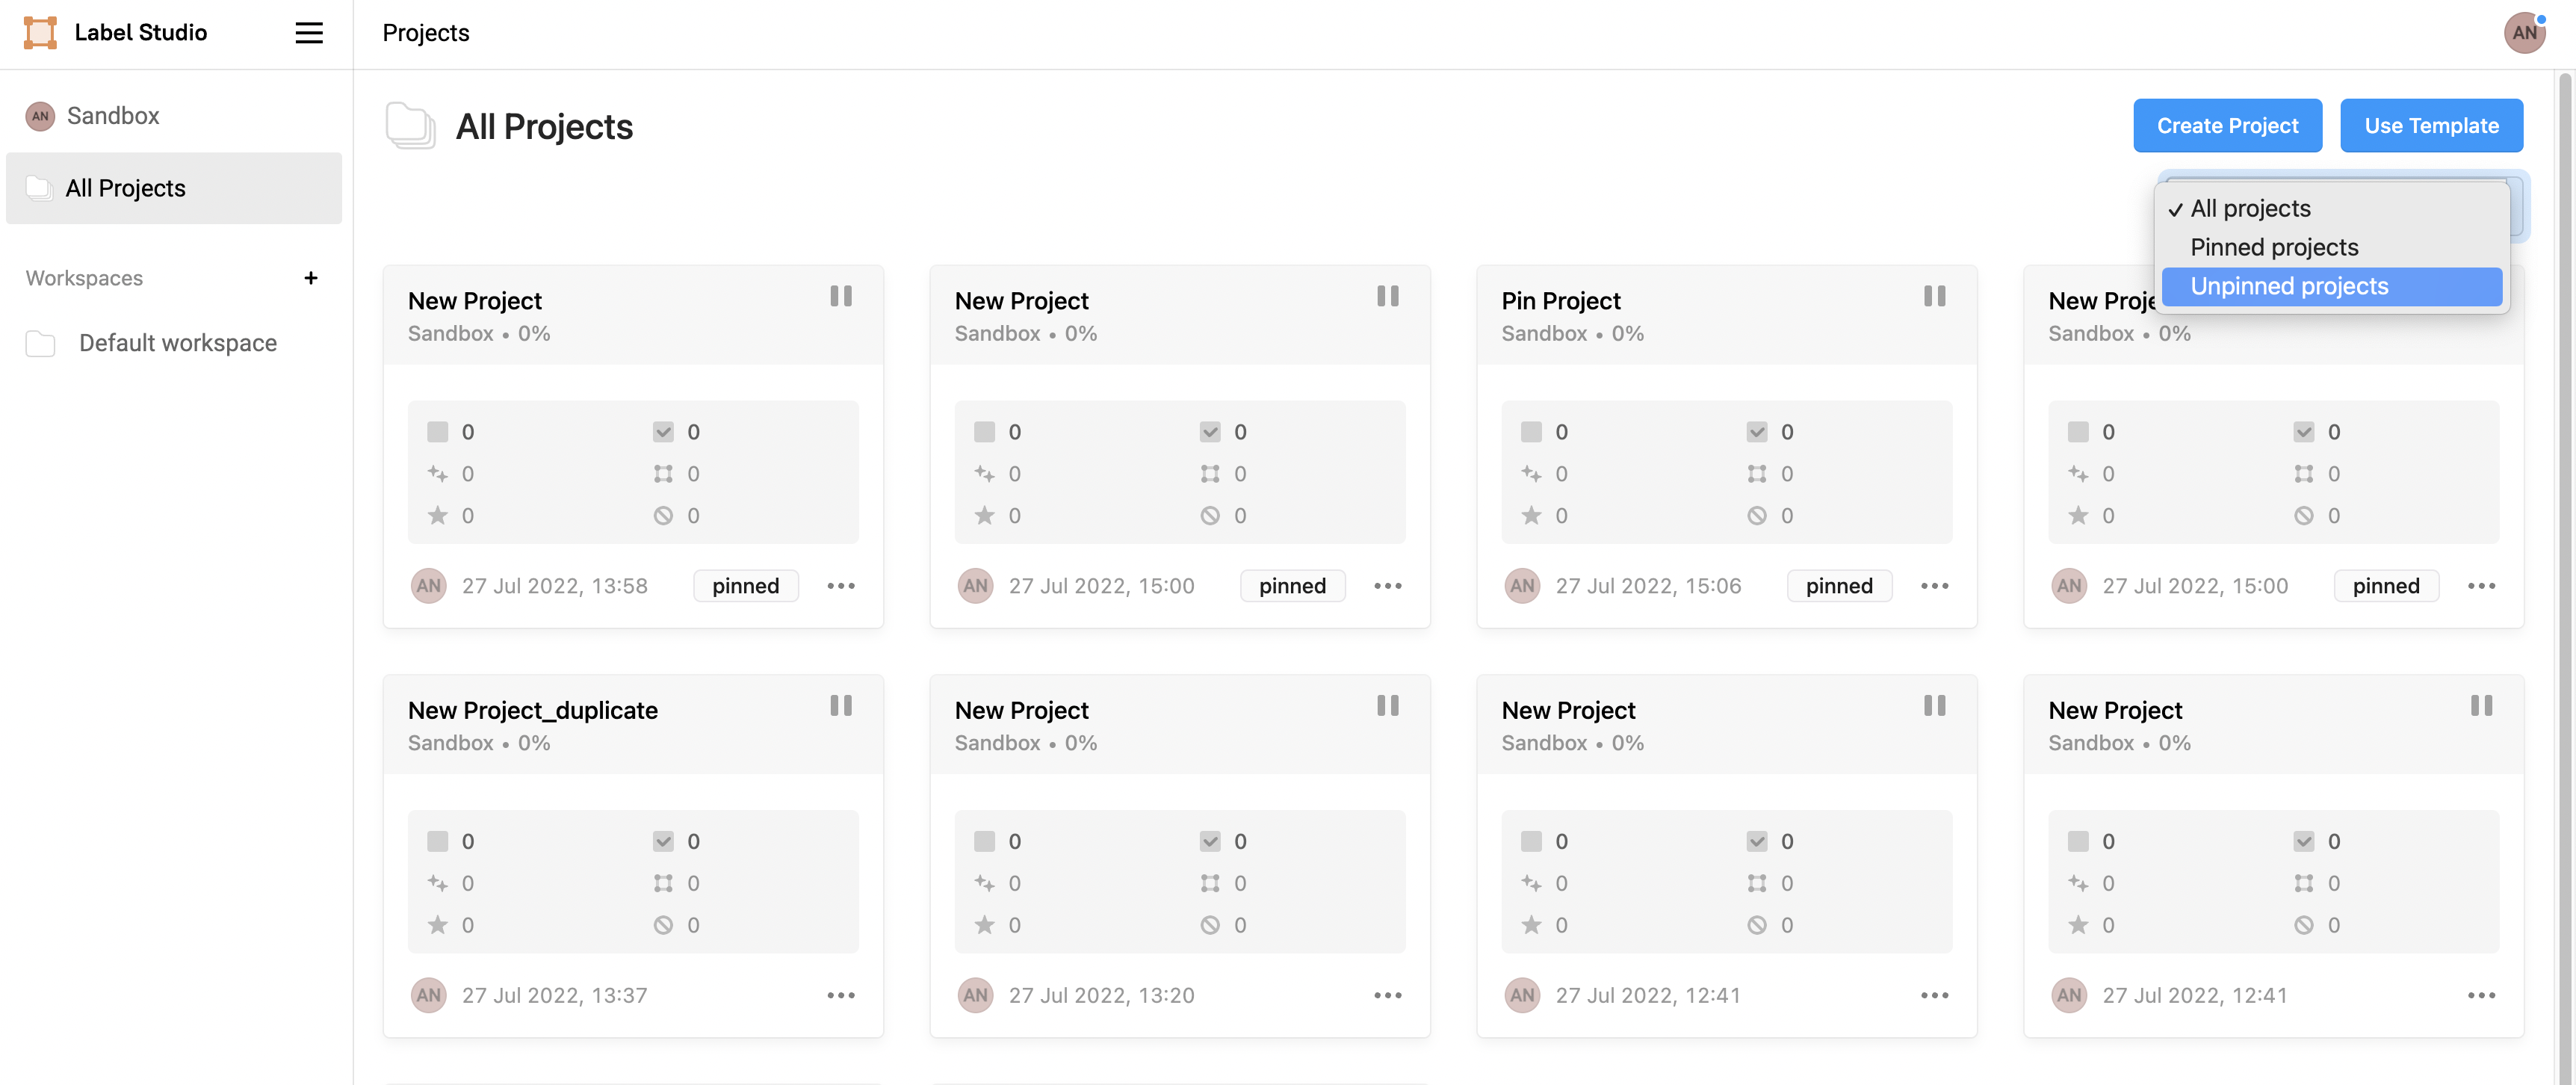
Now, you can see all the unpinned projects only.
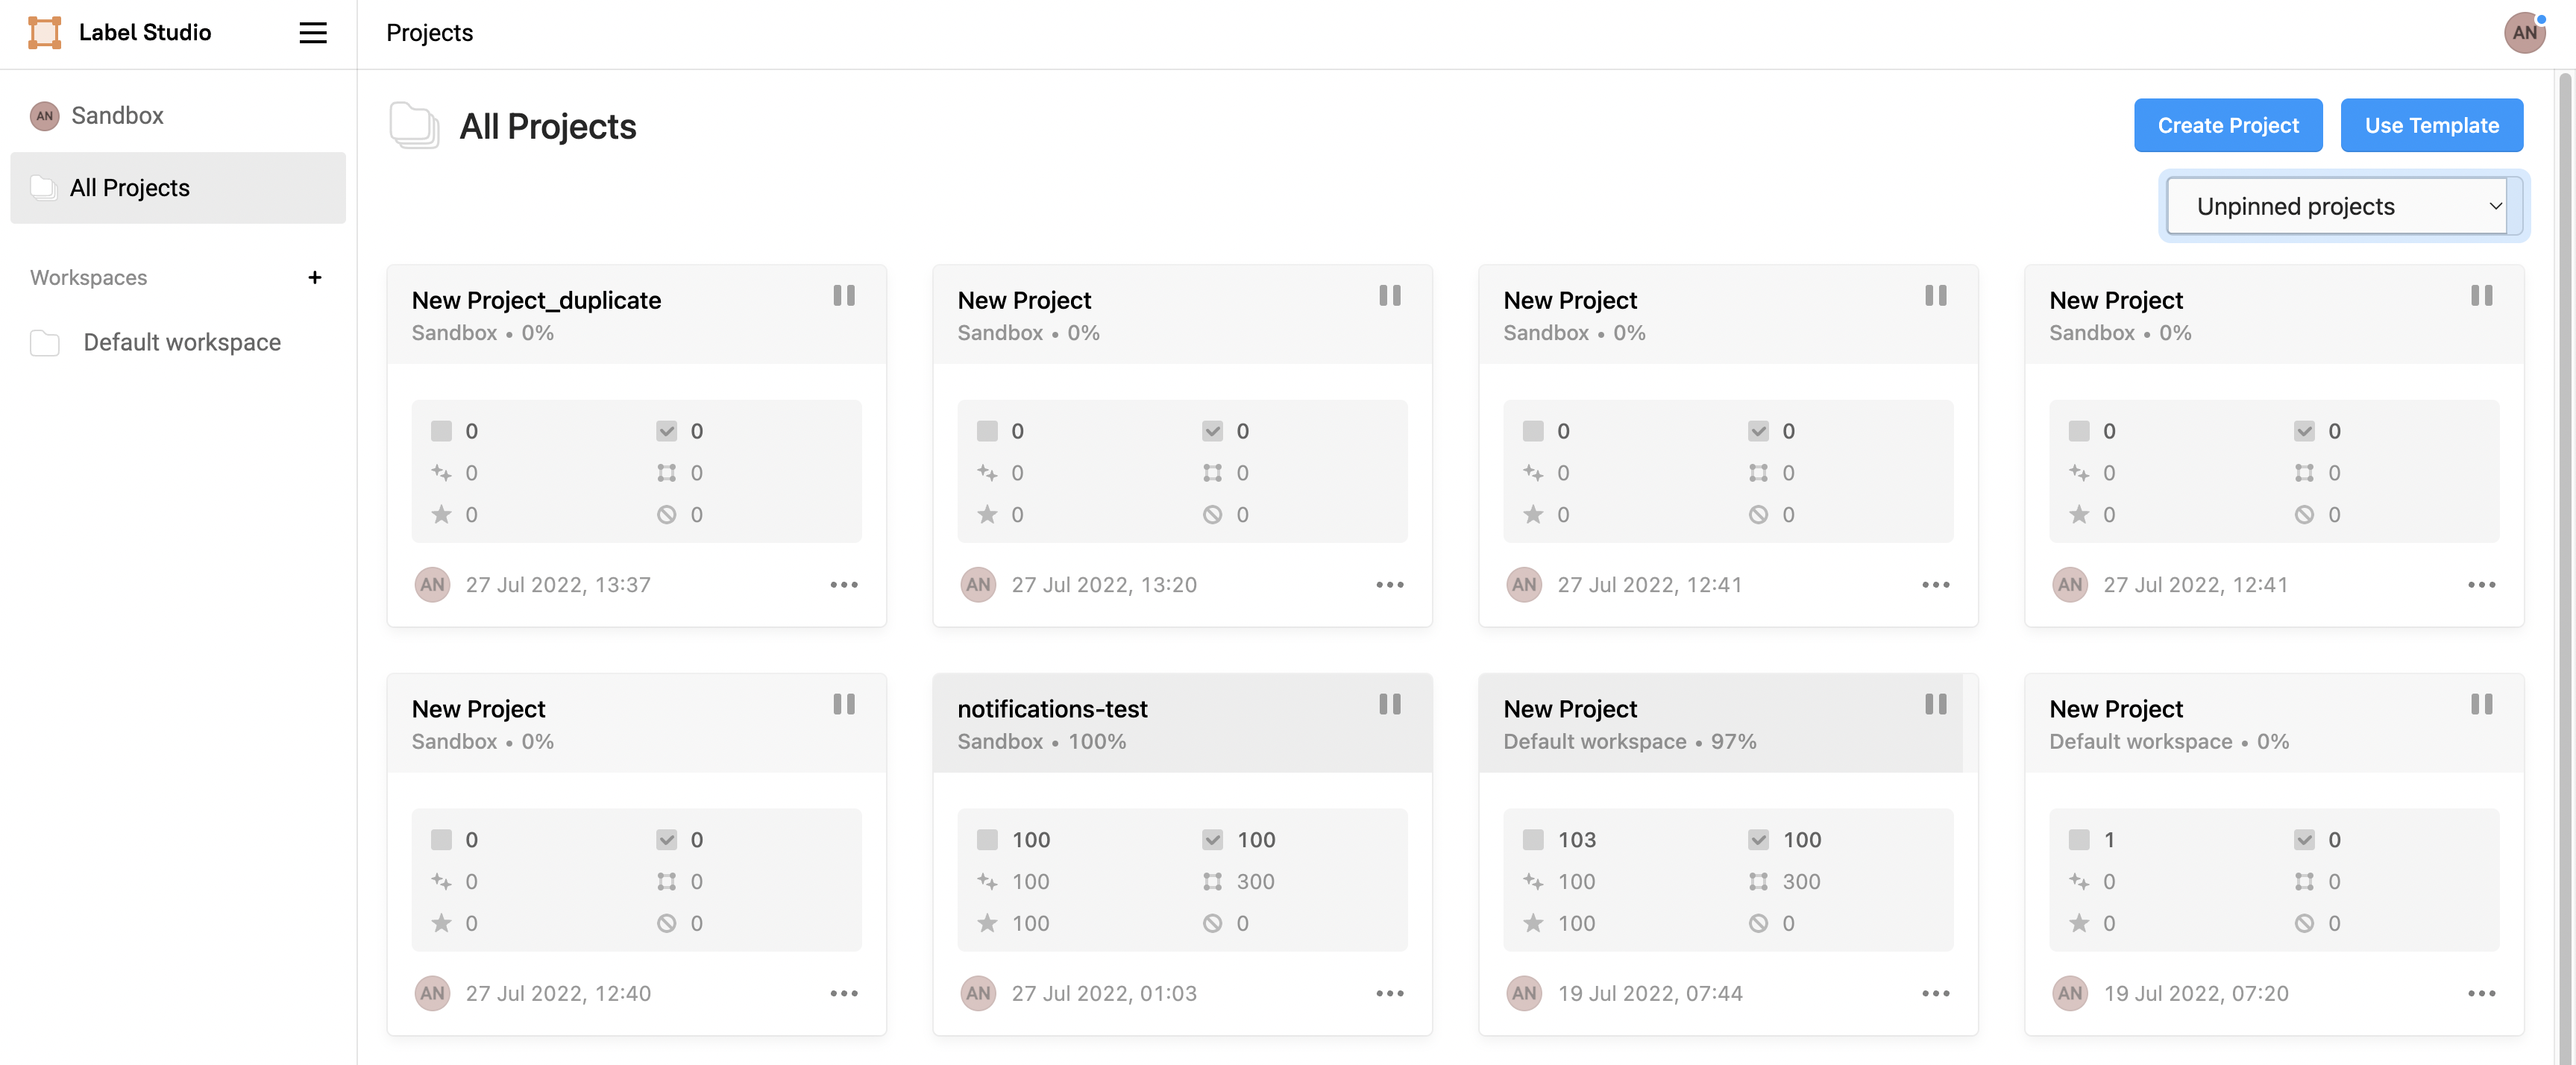
Figure 14: View only the unpinned projects.
- To view all the projects (both the Pinned and Unpinned projects), click All projects on the top-right side drop-down list.
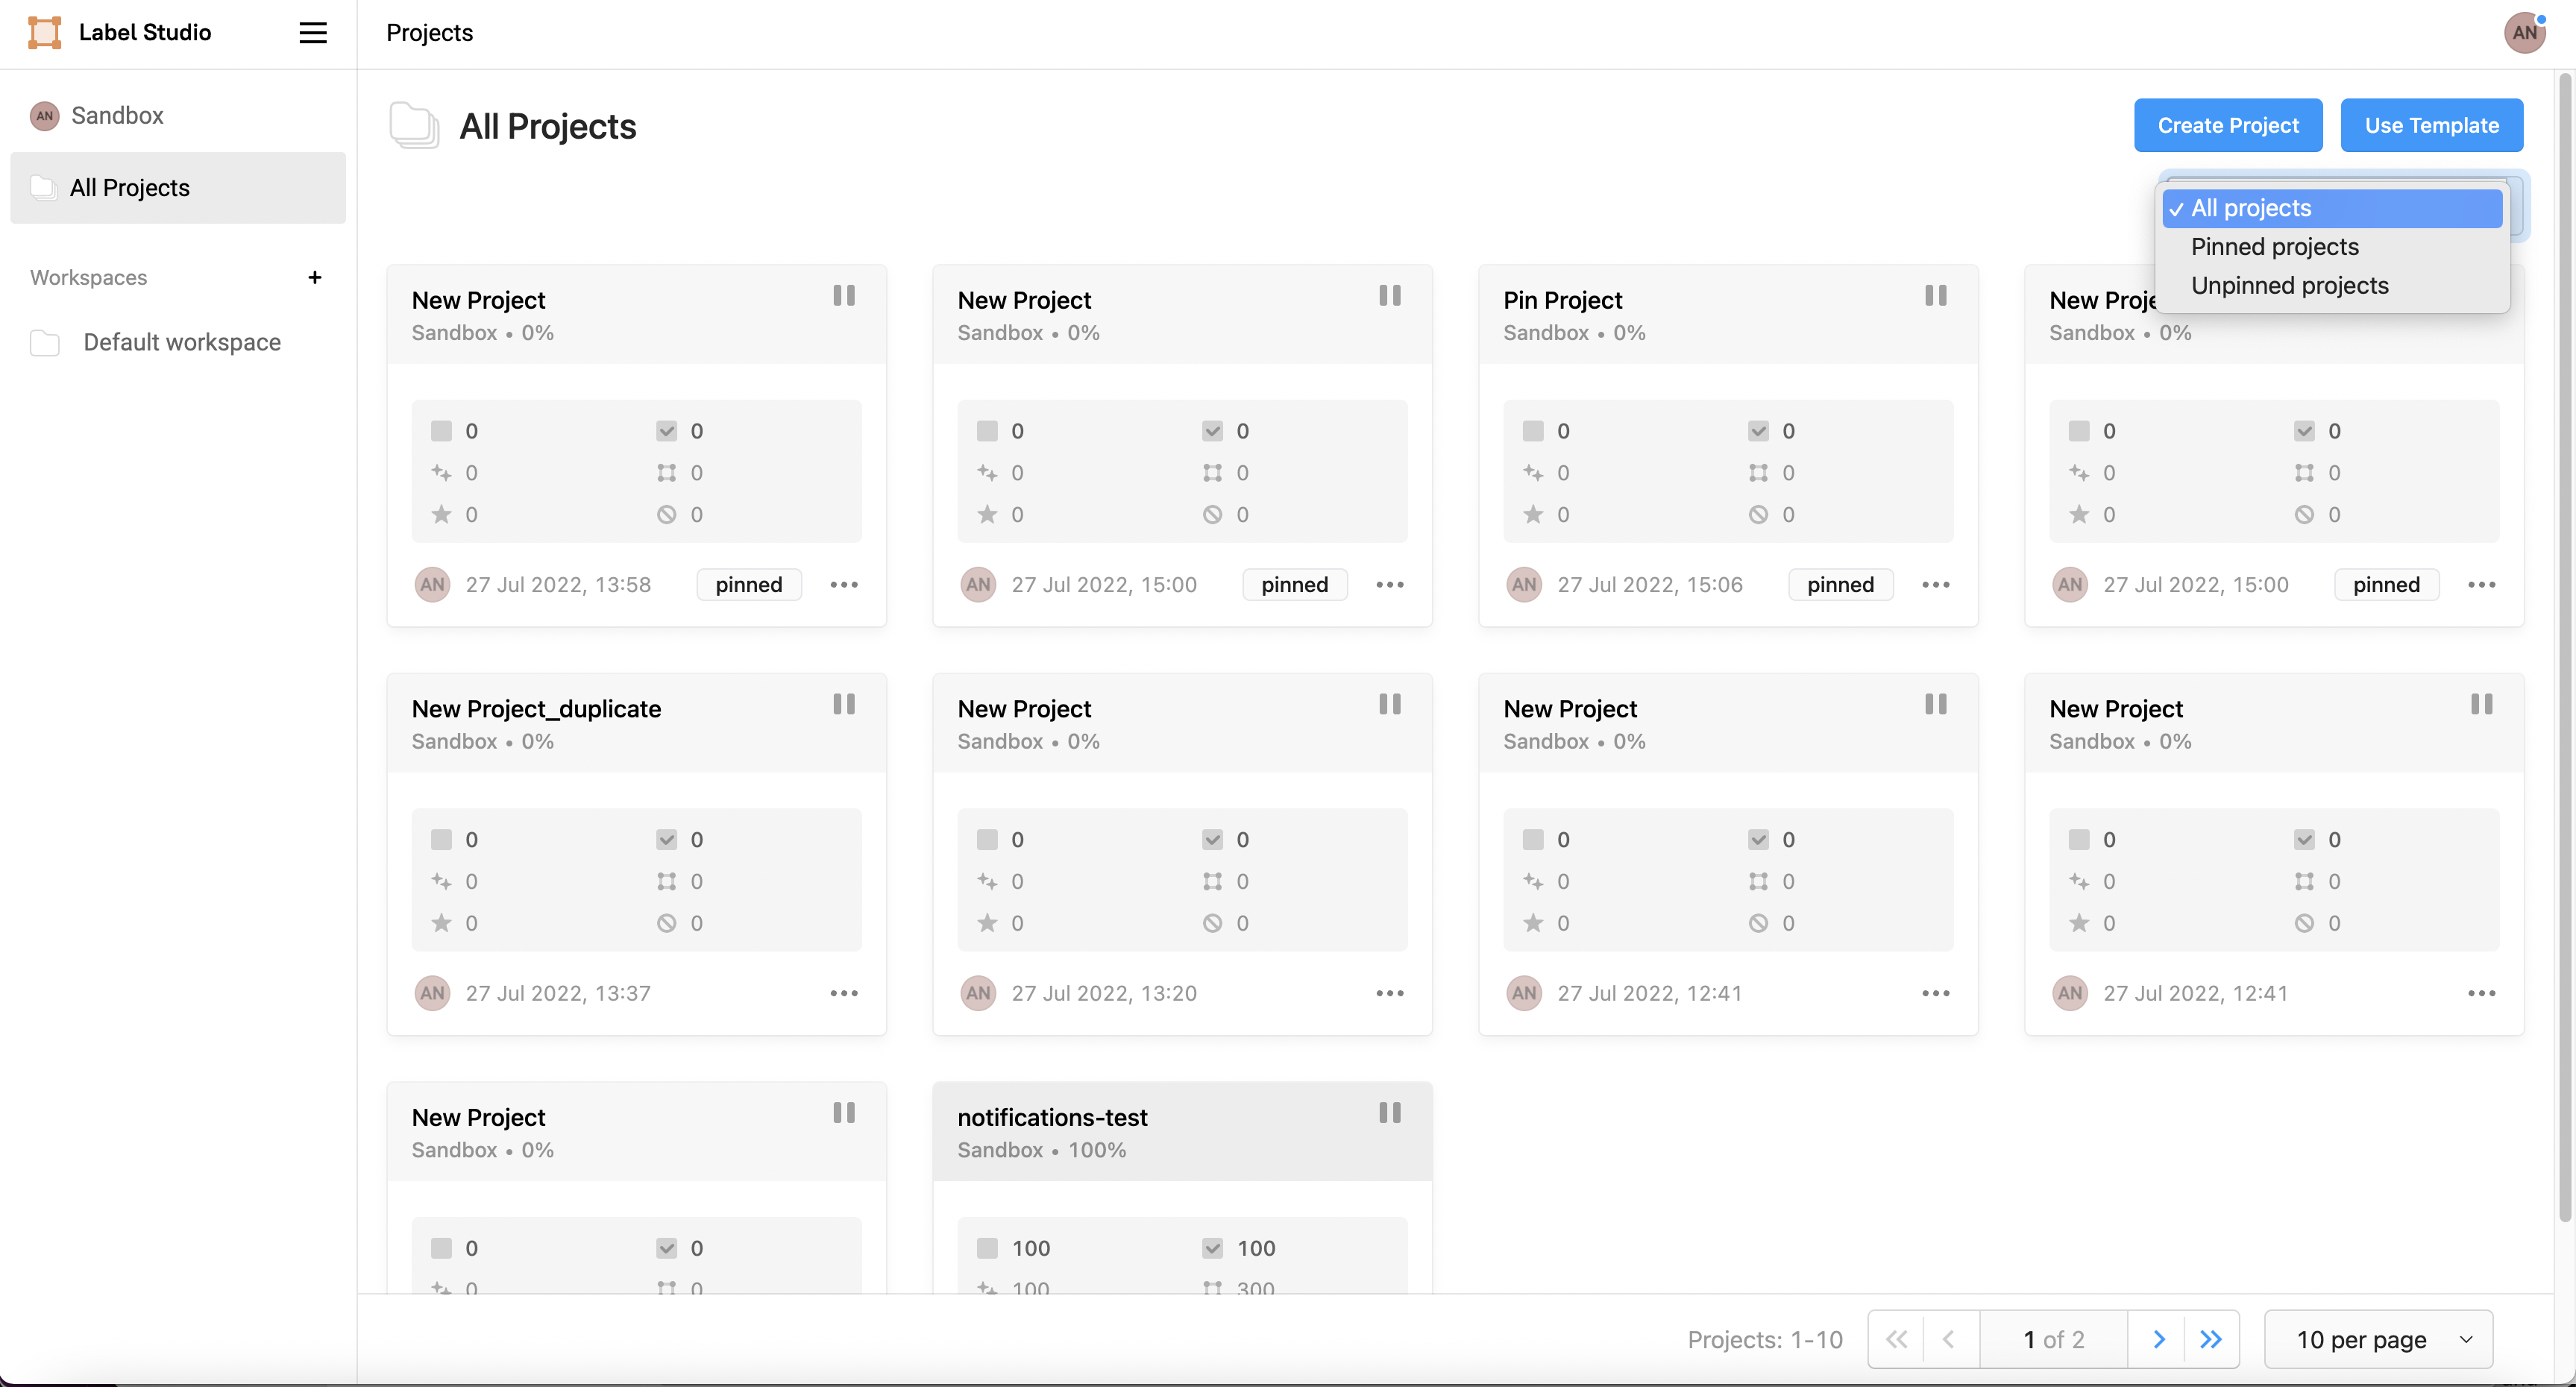
Duplicate a project
The Duplicate project feature allows you to duplicate projects to a target workspace optionally importing the settings, tasks, and annotations. Duplicate a project by using the Project’s settings or Project card’s more menu (three dots …).
To duplicate a project:
Navigate to your workspace page to see the project card with the three dots (…) and click Duplicate project.
Figure 16: Duplicate project button.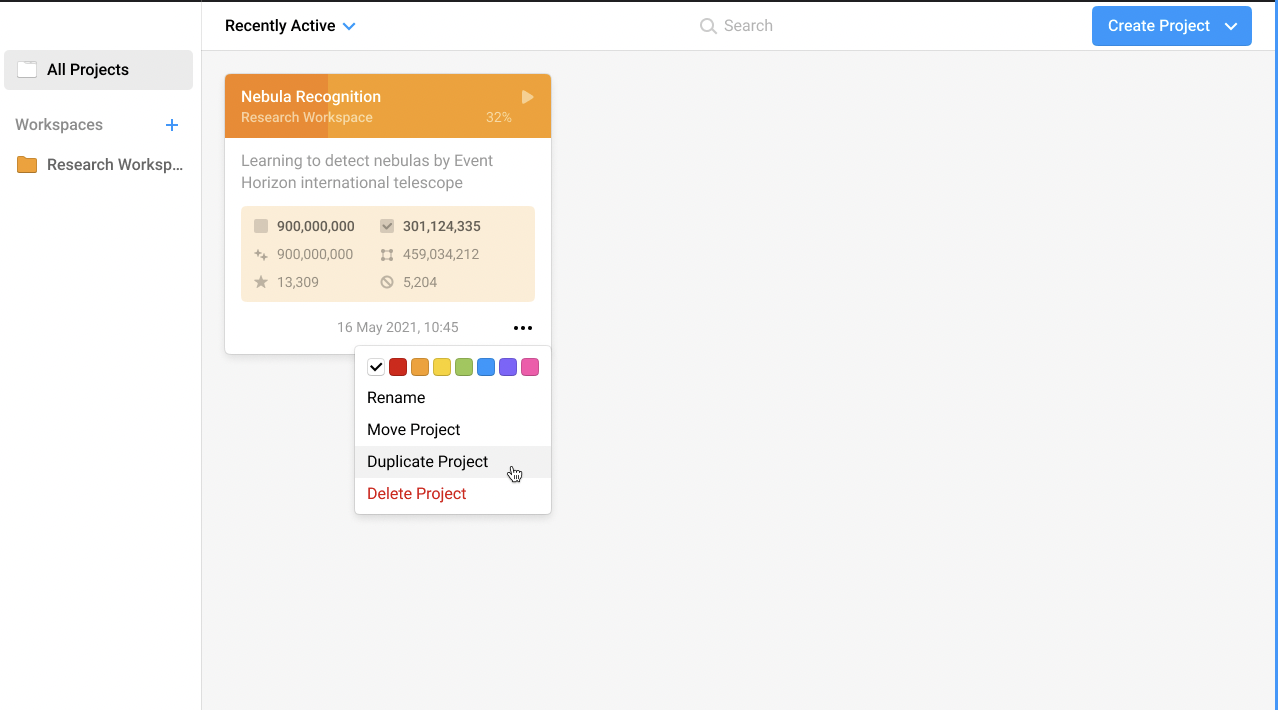
When duplicating, a pop-up window appears. Now, you can choose a destination workspace for a newly duplicated project using the following options:
Duplicate project with only settings.
Duplicate project with both settings and data.
Duplicate with settings, data, and all annotations.
Figure 17: Duplicate project options.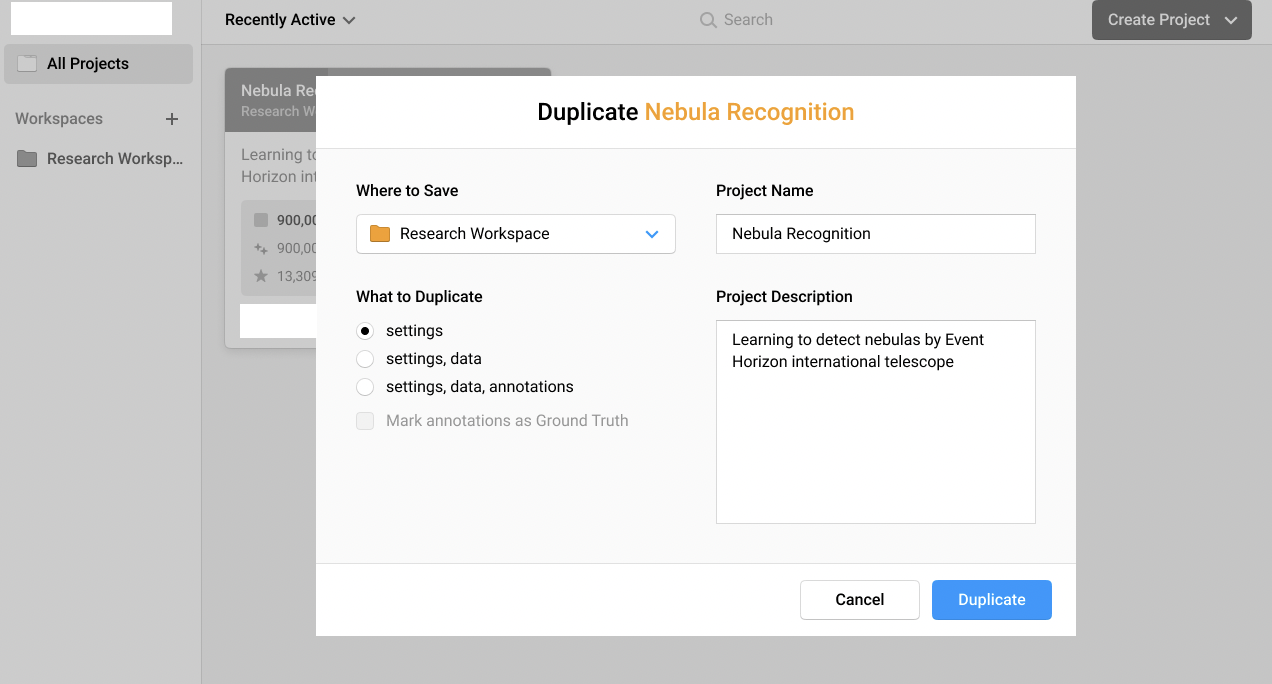
When choosing the last option, you also can choose if you would like to make annotations Ground Truth or not. In the Duplicate window, you can also give duplicated project new name and description.
Figure 18: Select the location to save your duplicate project.
Finally, the duplicated project is created.
Figure 19: Create a duplicate project.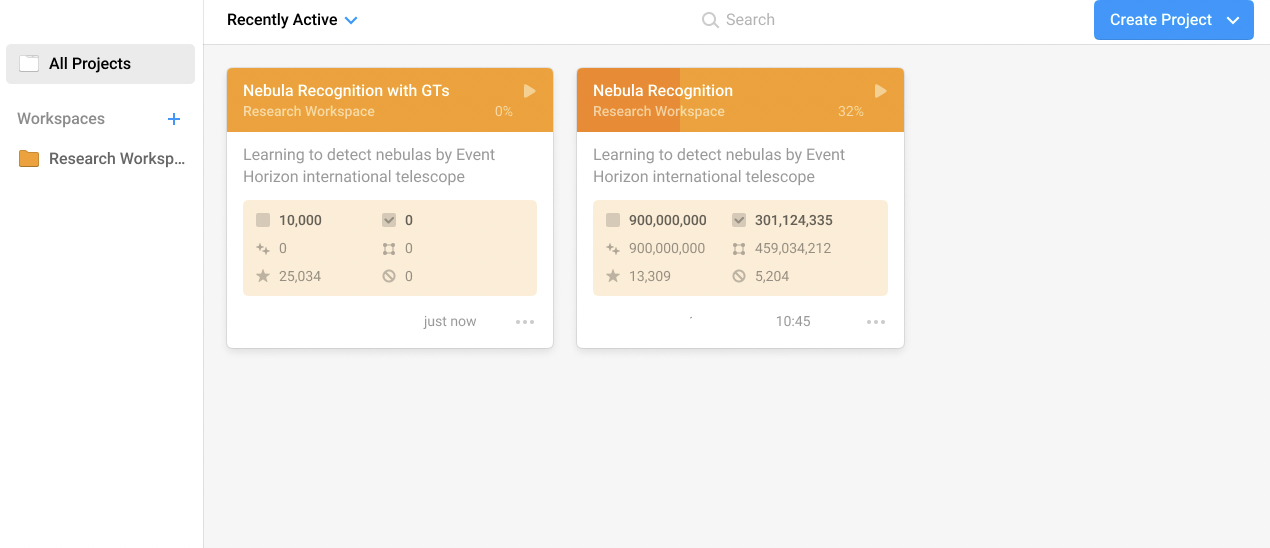
Delete a workspace
You can only delete a workspace if it has no projects. If you want to delete a workspace, first delete the projects or move them to another workspace.
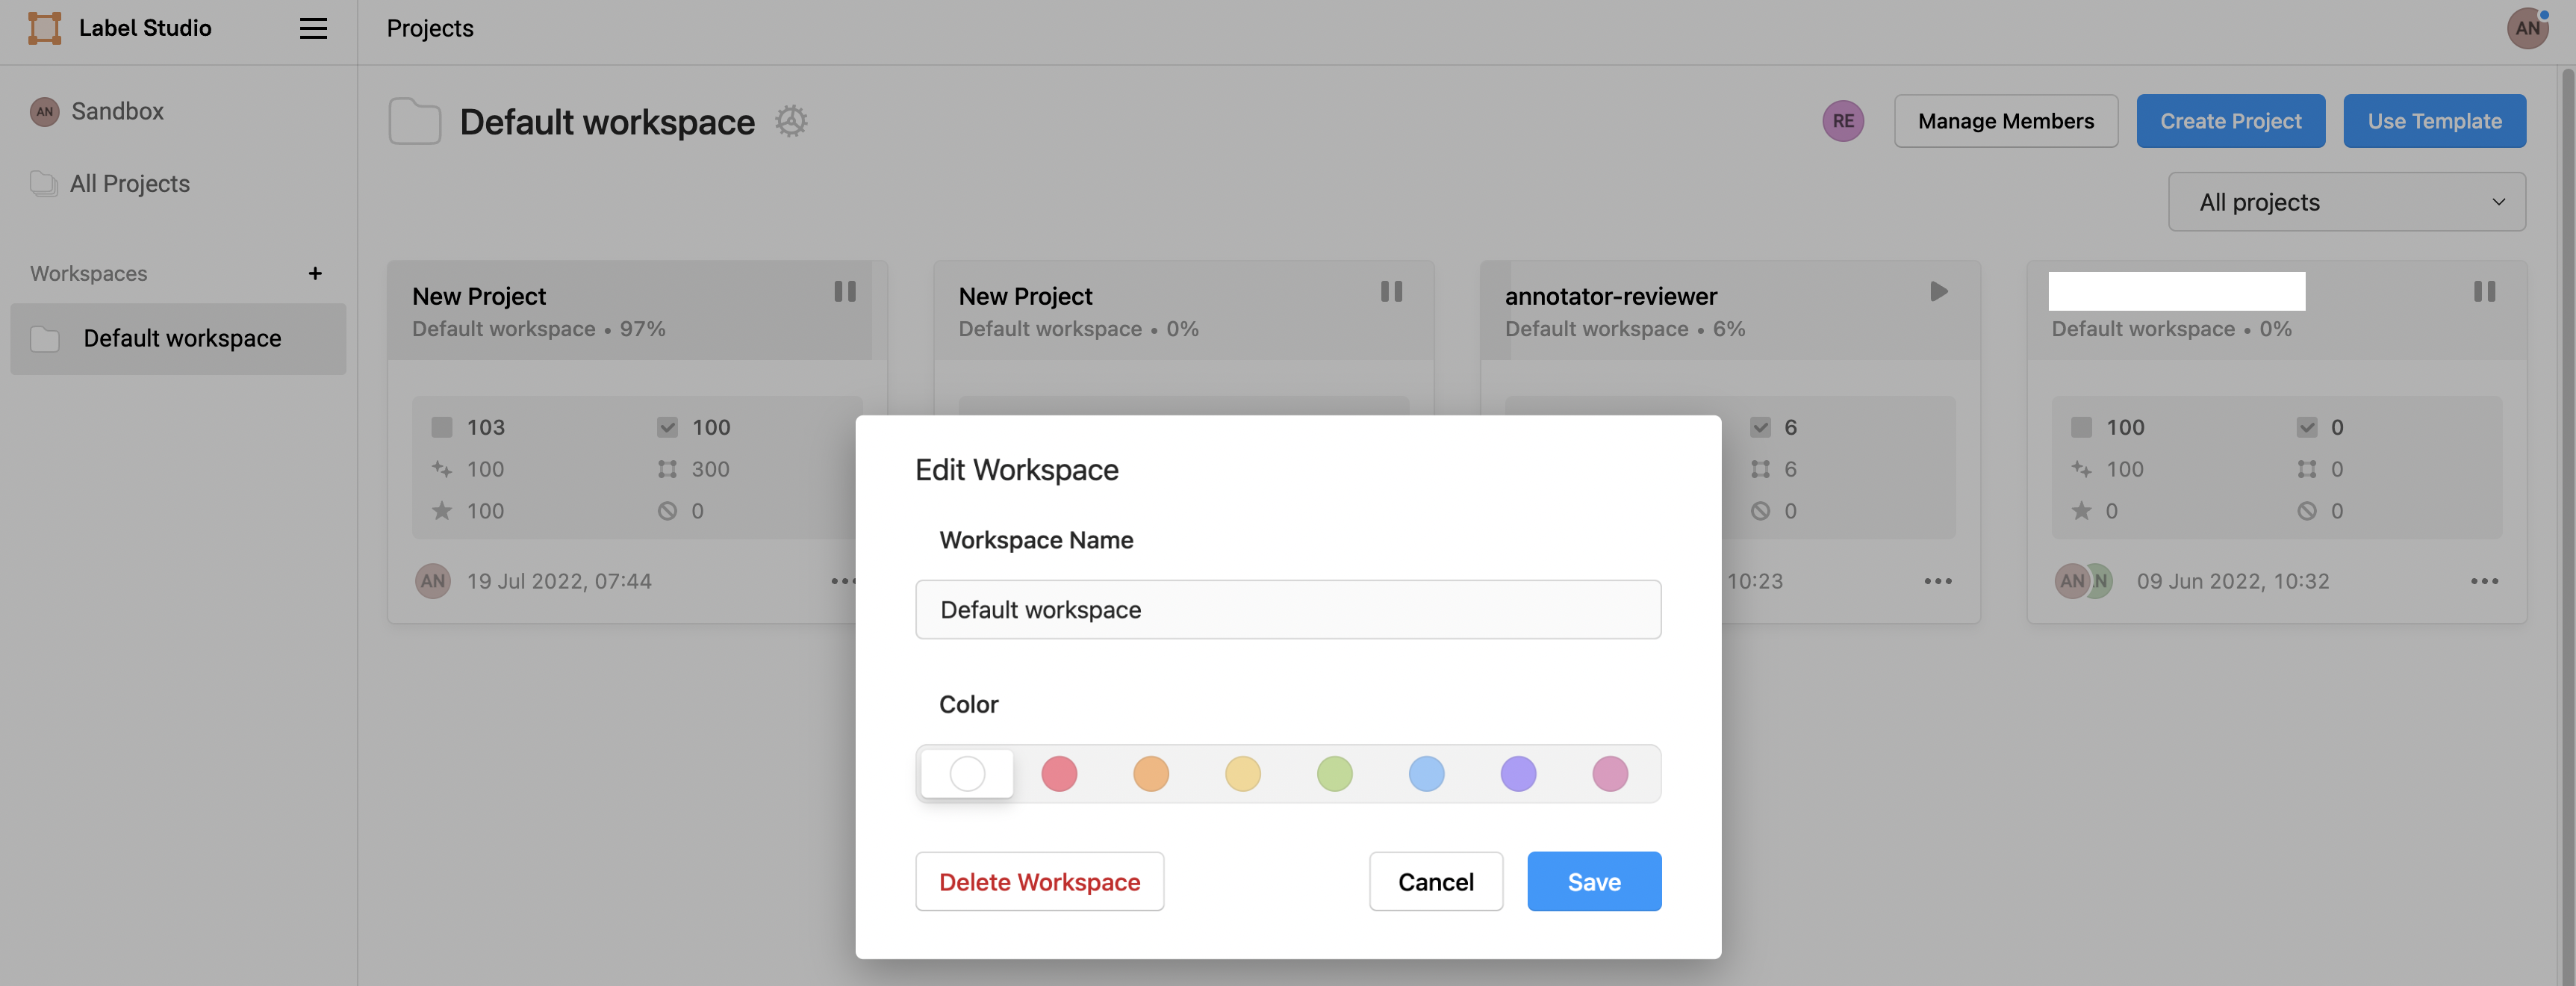
To delete a workspace, do the following:
- In the Label Studio UI, open the workspace.
- Click the gear icon next to the workspace name.
- In the dialog box that appears, click Delete Workspace. If the button is not available to select, the workspace still contains projects.

If you found an error, you can file an issue on GitHub!